A question I get asked quite often by guitarists of all skill levels is “how do I connect my guitar to my PC or laptop?” Most players are interested in recording and editing their playing for the first time, although another reason is the many great amplifier and effects modeling software that can be powerful tools for musicians to be able to access.
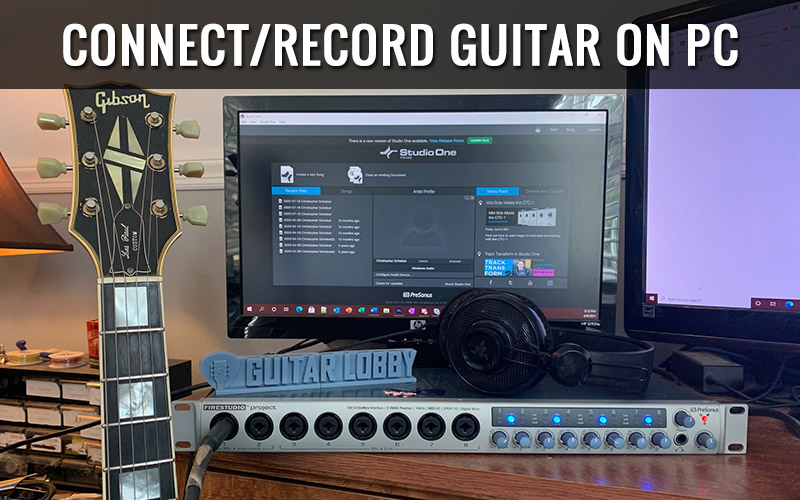
With modern technology, it has become very affordable to get high-quality recording gear with “studio-grade” sound without leaving your home. Doing so has a lot of benefits regardless, of your experience, and the equipment setup is simple enough that anyone can learn. In the rest of this article, we’ll cover exactly how to record guitar on PC or MAC.
How to Connect and Record Guitar on PC or Mac
To record your guitar on PC or MAC, first, you need to have a piece of hardware that is capable of being an audio interface to process your guitar’s analog signal into a digital signal that can then be input to your computer. This interface hardware is typically a dedicated audio interface box or it could possibly be a guitar amplifier or effects board if it’s a model that comes equipped with the features required to act as an interface to your computer. After you have an audio interface, you need Digital Audio Workstation (DAW) software on your computer that is designed to process and edit your guitar’s signal coming from the audio interface.
It doesn’t matter what instrument you play, the following applies to any instrument you want to connect to your computer. By the end of this article, you’ll understand basic recording requirements for acoustic as well as electric instruments. In most cases, the variation occurs with acoustic instruments and their dedicated microphones (For example clarinets require a different type of microphone than would be used for recording vocals).
What Do You Need to Get Started?
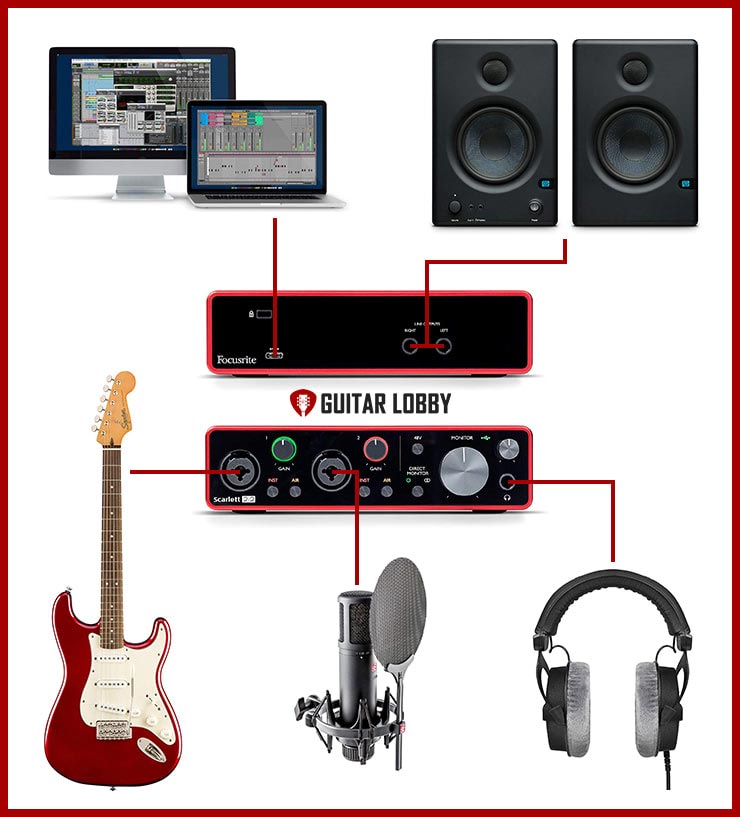
Connecting your guitar to your PC/laptop is easy, but you do need a few pieces of specialized equipment to do it properly. Do not plug your instrument into random inputs on your PC/laptop, they were most likely not designed to handle the signal from your instrument, they will work poorly, not at all, or in some cases, you could damage your computer.
1. Audio Interface
The first piece of gear you’ll need is an audio interface. The purpose of an audio interface is to convert the analog signal coming from your instrument into a digital signal that your PC or laptop can interpret correctly, with minimal loss of sound quality.
2. DAW
A Digital Audio Workstation is a dedicated piece of software, designed to handle most tasks related to instrument recording, looping, audio editing, mixing, and music production in general with all that this entails. Though a DAW is not an absolute requirement to connect your guitar to a PC or laptop, as there is a good amount of software out there that just lets you loop or add different effects to your tone, it’s the most versatile platform to tinker with your sounds, and it’s definitely worthwhile to invest some of your time learning to use one. Most of the software will run just fine on MAC as well as Windows PCs, and there are lots of free options to choose from.
3. Microphone (If your instrument doesn’t have a pickup)
If you own an acoustic instrument that doesn’t have a pickup, like an acoustic bass or guitar (or vocals, wind instruments, percussion instruments…) you will need a microphone to record it.
4. Monitors/Headphones (Recommended)
Once you have run your signal through the audio interface, you will need a way to listen to it. You can get passable results using a standard PC speaker set, though it is not recommended because they are usually unable to faithfully reproduce your sound. The best results can be achieved with a decent pair of monitor headphones or monitor speakers. These are designed to deliver a flat response curve (or as flat as you can afford), meaning that what you hear is as close as possible to your true undigitized sound – no more, no less.
5. PC or laptop
The most cost-effective way to connect a guitar to your computer is to go with what you already have. But there are advantages and disadvantages to both PCs and laptops. The rule of thumb is that as long as your computer can run your desired software, you’re good to go.
A PC is generally more expensive and more powerful than its average mobile counterpart, and its inherent modularity makes upgrading it relatively easy. Editing and digital processing on a PC are faster than on a laptop, so if you want to record multiple tracks and add a lot of effects, a PC is the way to go.
On the other hand, Laptops are not as powerful PCs but they offer great convenience and mobility. If you are traveling, or if you want a change of scenery to get those creative juices flowing, a laptop is an ideal companion. Heavy editing and processing can be a bit slow and frustrating sometimes, but for songwriting, recording, or looping (to be processed at a later point in time) it will perform just fine.
It all depends on what you want to do.
Audio Interface Setup (with Recommendations)
As stated above, an audio interface lets you connect your guitar or bass to a computer, usually through a USB port. They come in various shapes, sizes, and varying price points, depending mostly on their capabilities and the quality of their components.
A good audio interface will enable you to get a high-quality audio signal in and out of your computer while being able to accommodate a wide range of instruments, microphones, headphones, and other studio equipment. Its basic function is to convert your analog signal from your instrument into a digital one, and back again (ADC/DAC analog-to-digital convertor/digital-to-analog convertor). A quality ADC/DAC will ensure that none of your precious tone gets lost when passing through the interface.
Besides a good ADC/DAC, a good interface will have a high-quality preamp, to raise the signal level of your instrument or microphone to industry-standard specs.
A headphone output with a good preamp is a prerequisite for a good interface, as a good set of headphones is the least expensive way to monitor your sound. Connecting headphones to your interface will also let you practice in silence, this is especially useful if you already have a few effects – probably the “cleanest” sounding practice amp to ever grace your ears.
There are many audio interfaces on the market, and their set of features usually determine their price tag. Thinking about what you want to do with your interface will point you in the right direction, but they will all let you connect your instrument to a computer.
Now that we’ve gone through the basics, let’s look at a few examples of worthwhile audio interfaces.
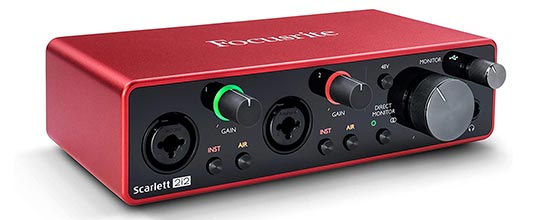
Focusrite has produced one of the most popular audio interfaces on the market today: the Scarlett range. These interfaces feature at least an instrument input and a microphone input, so you can record yourself playing and singing at the same time, a high-quality headphone preamp, and a monitor speaker output. The current third generation of Scarlett interfaces also features an “AIR” mode on the inputs, designed to spice up the sound of your instruments or vocals as if running through a transformer-based preamp.
At first glance, you may get flustered seeing the multitude of knobs and switches, but rest assured, they are intuitive to use, and all make sense after a few minutes of experimenting.
You just can’t go wrong with the Scarlett range, they are very well-built, they sound great, they let you connect anything you may want to (including phantom power mics), and perhaps most importantly they are very affordable. You can get the Focusrite Scarlett on Amazon here.
Here’s an example of a hardware bundle they offer with everything you need to get started:
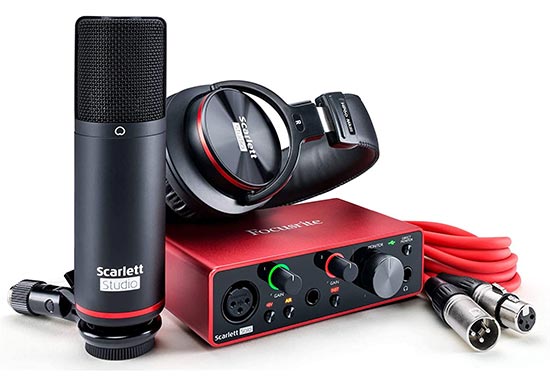
If you are planning to record acoustic instruments or vocals, Focusrite also offers well-priced bundles, containing a decent set of Focusrite headphones, or microphones, or both. You can get the Scarlett Bundl on Amazon here.
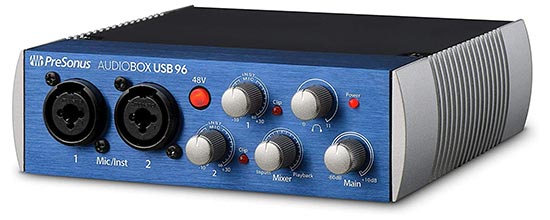
PreSonus has been providing quality gear for the audio industry for over 25 years. Their expertise and experience has manifested in the AudioBox USB 96. It’s a sturdily built little box that features two combo inputs, designed to handle anything from microphones (with 48V Phantom Power if you need it) to instruments at the same time. Besides the standard headphone and monitor outputs, it also boasts MIDI ins and outs letting you connect external MIDI controllers, an option you will not find on most entry-level audio interfaces.
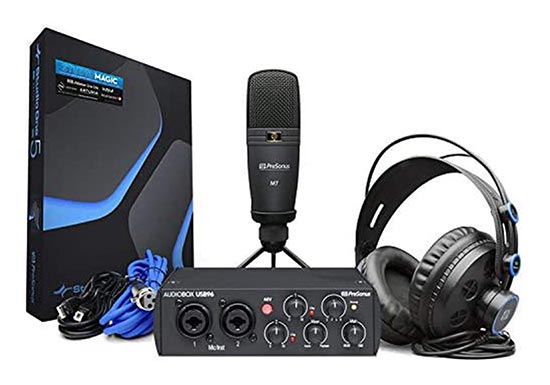
If you are just getting started with home recording, and you don’t own any other gear or software, PreSonus also offers bundles containing a set of decent monitor headphones, a condenser microphone, and some cool software to get you started. This is probably the most affordable way to get into home recording.
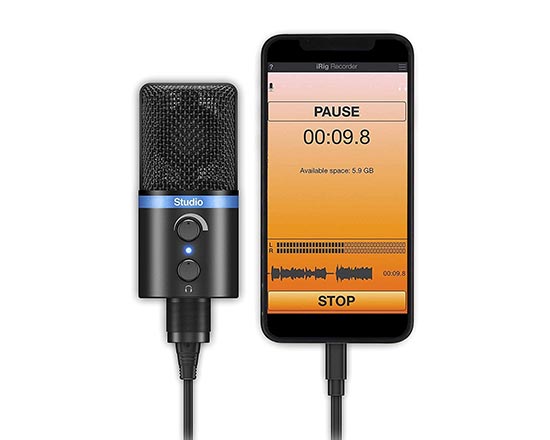
3. iRig HD 2
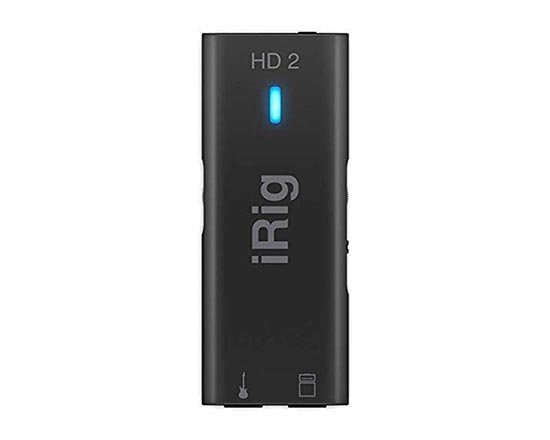
If you are looking for extreme portability and just want to plug in and record anywhere, take a look at the iRig HD 2 from IK Multimedia. It’s a super-compact audio interface that lets you easily record directly to your iOS device or PC, Android is not supported!
As the name suggests it was designed to function as a virtual rig; it may not have the versatility of one of the desktop audio interfaces we talked about earlier, but it’s a powerhouse in its own right. It has an instrument input, a headphone output, and a line output that lets run the signal straight into an amp. It comes with a full version of AmpliTube 4, and this makes the iRig the top portable audio interface. Connect it to your iOS device and you get a complete virtual rig, with amp simulations, and a multitude of digital effects simulations that all sound very good.
The sound quality you get with the iRig HD 2 is comparable with its less portable brethren, and the AmpliTube 4 software eliminates the need to take your pedalboard along with you (assuming you own an iOS device if not, it will work just as well with a PC/laptop).
Multi-effects Pedals Setup (with Recommendations)
Clearly, the most efficient and versatile way of connecting your guitar or bass to a computer would be through a dedicated audio interface, but for various reasons, you sometimes have to roll with what you already have in your setup. And if you own a relatively recent digital multi-effects processor with a USB port, it’s likely capable of being utilized as your audio interface. Besides multi-effects units, manufacturers have been building audio interfaces into digital stompbox-sized pedals, so check out what you have on your pedalboard, you could save yourself a few bucks if you just want to connect to your computer and lay down a few licks.
Here are a few examples of multi-effects processors, and stompboxes that can serve as a basic audio interface:
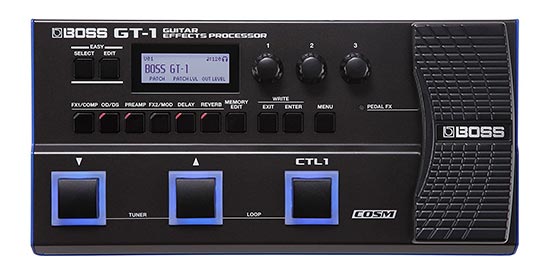
2. Boss GT1
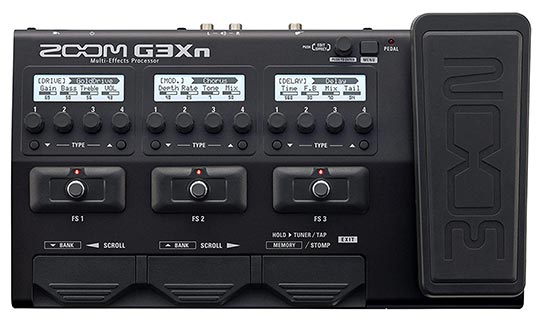
3. Zoom G3XN
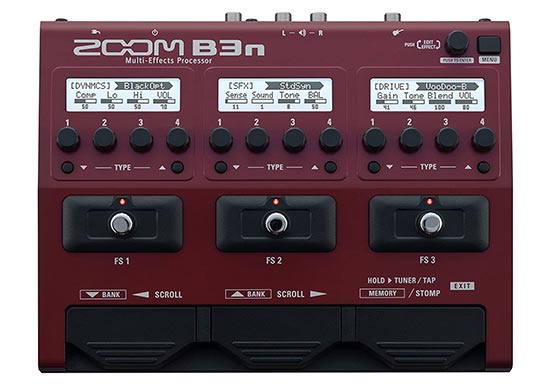
4. Zoom B3n (Best for Bass Guitar)
One of the main advantages when connecting to a computer through your multi-effects unit is that you can use your pedal’s sounds and effects. Assuming that you like the sounds of your processor, you won’t have to spend any cash on plugins or VST’s to spice up your guitar tone.
If you don’t like how your processor sounds, you can always turn them off and use your clean signal only, then add effects through software plugins.
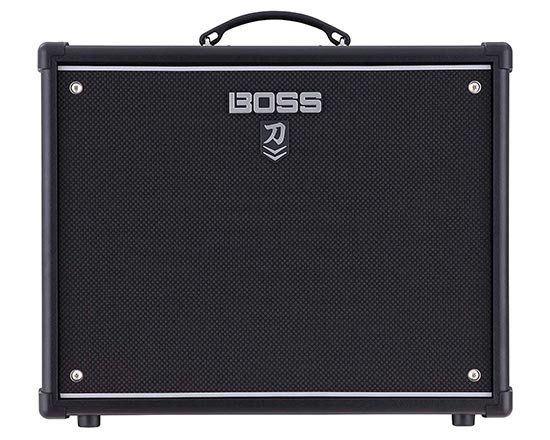
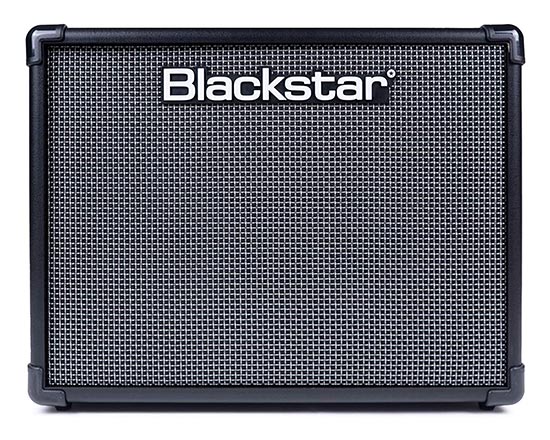
Utilizing Amps (with Recommendations)
In recent years, modeling amps have become more affordable, and with much better sounds on offer than in their early days. Many of these amps have USB connectors that let you employ them as audio interfaces. So if you own an amp that has a USB port, just check the manual if it can double as an interface, you could possibly save some money by connecting it to your computer. As with multi-effects units, one of the advantages you have is using the tones your amp already produces without the need for a microphone to record your sound.
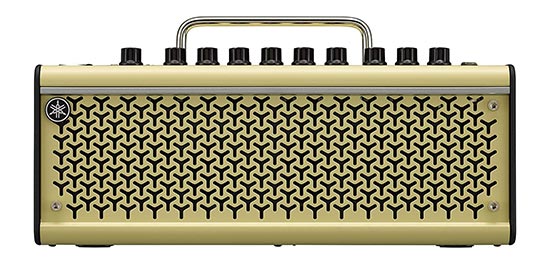
Here are a few examples of guitar amps that feature USB audio interfaces:
All Analog
If you don’t own an amp or a multi-effects processor with a USB port, or if you have chosen the all-analog route for your sound, an external audio interface the likes of which we discussed earlier, will be your best option: they are cheap (at least cheaper than a new processor) and they are versatile.
Recommended Headphones/Monitors/Speakers
Now that we’ve gone through all the ways you can connect your guitar to a computer, you will need some way of listening to what you’ve played into it. Many of you will have some kind of desktop speakers, a pair of headphones, or earbuds. The problem with these is that what you hear is not necessarily what you actually get. Standard computer speakers and headphones are not designed to faithfully reproduce the frequencies of your instrument, especially if you add effects into the mix. You can definitely get by with them, but to be sure of what your recording actually sounds like, you will need a set of desktop studio monitors or studio headphone monitors.
Headphones
A good set of headphones is an invaluable and relatively inexpensive tool when connecting your guitar to a PC/laptop. In most cases the headphones you use are more important than the audio interface, as the sound quality and fidelity of even cheap audio interfaces are good enough for a faithful tone reproduction; and playback devices are the area where most of us cheap out.
One of the main attributes of a good pair of monitor headphones is their flat response curve, meaning that they reproduce the frequencies sent to them without adding or subtracting anything to make the sound more pleasing to our ears. Run-of-the-mill headphones can be too bass-heavy or too tinny, heavily influencing how you EQ your sound to make up for your perceived abundance or lack of frequencies.
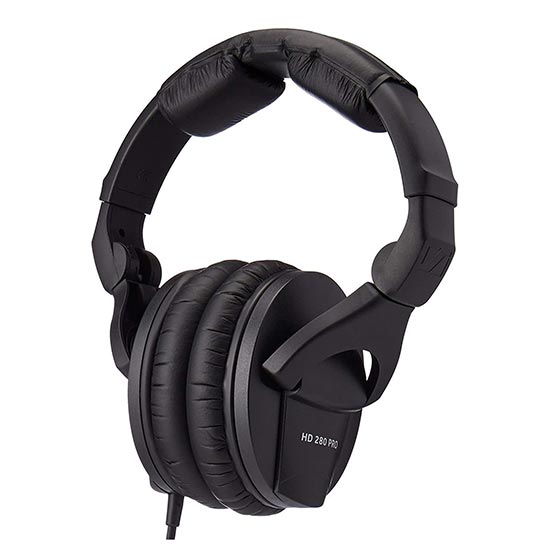
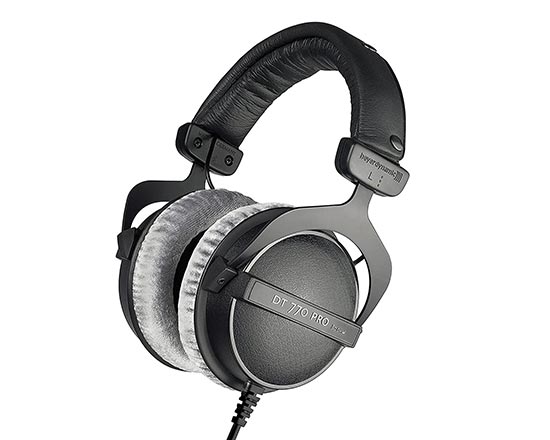
Here are a few examples of good studio monitor headphones:
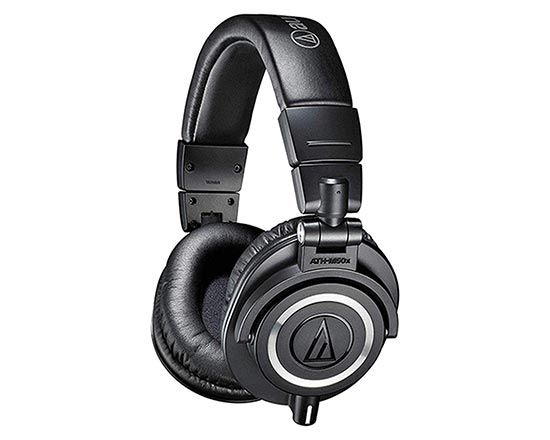
The ATH-M50x is considered somewhat of an industry standard and has been named one of the best monitor headphones at their price point numerous times since their introduction almost 15 years ago. You’ll be hard-pressed to find bad reviews of them.
If you oscillate between a more expensive audio interface and a set of good headphones, you will probably be better served in the long run with good headphones.
Monitor Speakers
The speakers you use when listening to your recordings will play an important role in the way you perceive them, and as a consequence, they will influence the way you mix and EQ them. As with the headphones, the regular desktop speakers you use with your PC/laptop will probably not make the cut if you expect fidelity from your gear. Professional musicians and sound engineers use studio monitors because these don’t color the sound ( they do, but the manufacturers try to minimize this coloring as much as possible). Consumer desktop speakers change the tone to make it more pleasing to our ears, this usually means that the bass gets a boost, the mids get cut, and the highs also get an increase. The bottom line is that you don’t want an altered and colored version of your sound; what you want is a speaker that will let you listen to your sound as faithfully as possible.
Choosing a studio monitor is a topic of great importance among musicians and audiophiles, and often results in grand arguments. The prices for studio monitors can get exorbitant towards the higher end, but luckily, good studio monitors have become increasingly available in recent years, while steadily getting more affordable.
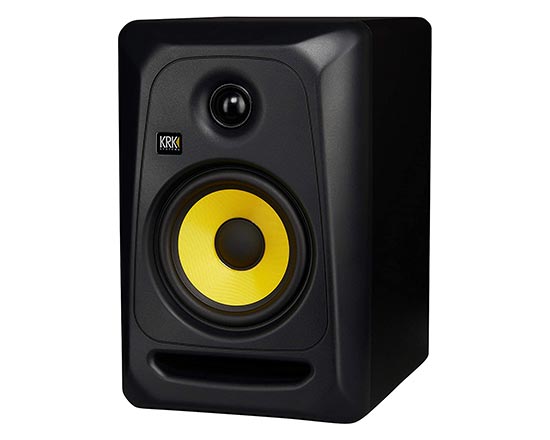
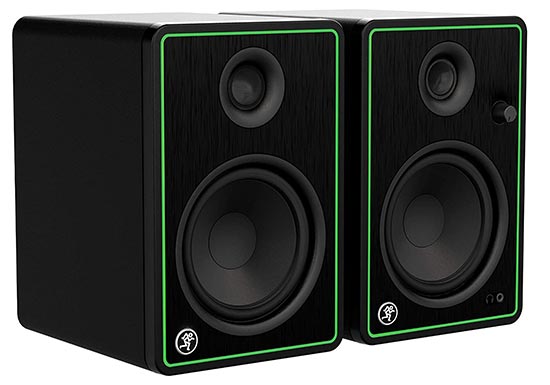
Here are a few of our picks for a good pair of monitor speakers:
1. KRK Classic 5 (You need 2 of them)
2. Mackie CR5-X
Recommended DAWs
Once you have all the hardware you need to connect your guitar to a computer, you will need a DAW (Digital Audio Workstation) to manipulate your tracks, loops, and recordings. You can think of a DAW as an entire recording studio in software format; anything you can do in a physical studio, you can also do in a DAW. There are many DAWs out there, and in essence, they all do the same thing, but they are certainly not created equal. Some DAWs are better suited for recording and editing (ideal for guitar players), while others excel with music styles requiring careful and precise manipulation of samples and loops (best for electronic music or hip-hop)
A good DAW for guitar will have simple and easy-to-use audio editing tools, such as the ability to trim recordings, fade in/out, and so on; but not all will offer more than the basics.
Some of the best DAWs for guitar are:
PreSonus Studio One – it’s probably one of the easiest DAWs to learn and is packed with useful features for guitar players
Reaper – one of the most affordable fully-featured DAWs on the market, it has a simple interface and features great audio editing functions
Steinberg Cubase – it’s one of the more expensive options out there, while also being one of the most popular DAWs for musicians concerned with audio recording and manipulation
Some DAWs have limited plugin compatibility, and as a guitar player, plugins are your bread and butter. They give you access to entire libraries of legendary amps and effects, meticulously recreated in a software format. There are tonnes of useful and simple to use plugins out there, among them are:
IK Multimedia AmpliTube5 – also works as a stand-alone, without the need of a DAW, (AmpliTube4 comes free with the purchase of an iRig HD2, and it’s a great piece of software)
Positive Grid BIAS FX 2 – the GUI is excellent, and you get access to a huge number of amps and effects to tweak and mess around with
Line 6 Helix Native – takes the software out of the popular Helix line of multi-effects processors and offers it as a plugin. It gives you access to the same amps and effects as the physical Line6 pedal, but at a fraction of the price. The interface is not as straightforward to use as BIAS FX or AmpliTube, but it just takes a few more minutes to get used to it.
Connecting an acoustic guitar to a computer
Everything we discussed so far is aimed at electric guitars and basses (except the software, that’s the same for anything you want to run through it), meaning instruments that feature any kind of pickup. But what do you do if you want to record an acoustic instrument that doesn’t have a pickup or a ¼” output you can plug into?
For our specific purposes there are two kinds of acoustic guitar:
The first one has either a magnetic or a piezo-electric pickup, with an output jack somewhere on its body; this means that you can plug a standard guitar cable into it. From this point on, things are mostly the same as with an electric guitar or bass.
To have the best possible acoustic guitar sound, use an audio interface with two inputs, record two simultaneous tracks, one through a microphone, the other through the guitar cable, and blend them to your liking.
The second kind doesn’t have an output jack, so you’ll have to use a microphone to “connect” it to your computer.
There are many microphone options that work very well with an audio interface, like the Focusrite Scarlett Solo, but if you want a more portable setup, check out the iRig Mic Studio.
This is a microphone that doubles as a USB audio interface, and it can connect to a PC, Mac, Android, or iOS device. It functions like a typical audio interface when connected to a computer, and it has a headphone output. It’s a great choice if you value portability.
What’s the right setup for you?
As always, no answer will satisfy everyone, as needs are many, and uses are even more so. It all depends on what you want to do with your gear.
If you have trouble deciding what audio interface to get, try to answer a few of these questions for yourself, they might help nudge you toward the right one for your specific needs.
Do you already have something in your current setup that can serve as an audio interface?
- If you have a multi-effects processor or an amp with a USB port, and you just want to connect your instrument to a computer, chances are that you don’t need to buy another audio interface.
Are you looking for portability in a device that will enable you to connect to a PC/laptop, or would you prioritize versatility and extended functionality?
- If portability is paramount and you only want to connect a single instrument to your computer, take a look at the iRig HD 2, it’s a good audio interface as well as a virtual rig and digital pedalboard, and it’s very affordable.
How many instruments do you want to record at the same time?
- If you want to connect and record multiple instruments at the same time, look for an audio interface with the required number of inputs. Focusrite and PreSonus are two of the most popular brands offering audio interfaces; you will probably find something in their lineup that will do the required job, while not breaking the bank.
Do you want to connect a microphone to your computer?
- If you want to simultaneously connect an instrument as well as a microphone to your computer, check out the Focusrite Scarlett Solo, or PreSonus AudioBox USB 96. They are affordable, well-built, and sound just as good as their more expensive siblings.
Do you want to also record drums at some point in the future?
- If you are planning to build a small home recording studio, with the ability to record acoustic drums, you will need an audio interface that can handle multiple microphone inputs. This will drive up the price tag somewhat, as every input needs a dedicated preamp. A decent drum recording setup will need at least 4 microphone inputs. PreSonus or Focusrite will have you covered, but these are by no means the only ones, they are just some of the more popular choices.
Why is connecting your guitar to the computer a good idea?
It’s a great practice tool.
Hearing a recording of yourself can be a very revealing experience. Sometimes you are not aware of the subtle shortcuts you take while playing your guitar, and playing in a band only makes it harder to hear yourself properly most of the time. You could play a riff for years thinking it’s perfectly executed, while a simple recording could reveal all the imperfections in your technique. Having the flaws in your playing laid bare is never easy, but it is one of the fastest ways to improve, and remedying them is a sure way to becoming a better musician.
It’s a great creative tool.
If you want to improve your songwriting skills or if you feel uninspired, recording yourself could be one of the easiest ways to get out of your rut. As a first step, you can use your computer as a basic looper, recording phrases and playing over them. You can also add drum loops to get a more organic feel while composing. By doing this you can easily figure out what solos or different flavors you can add to make your tune that much better. This is very easy to do, it doesn’t require almost any music production expertise, and it makes the creative process much more intuitive; it’s like playing with a band. If you want to get even more out of this experience, you can start playing around with effects.
Every DAW (Digital Audio Workstation) lets you add dozens of guitar and bass-specific plugins, with all the effects you can think of, and amplifier simulations are also commonplace. This second step requires you to spend some time with the DAW to learn its basic functions, but the rewards are plenty. Once you’ve overcome this slight hurdle, you will be greeted with near-endless experimentation possibilities that can certainly lead you down unexplored and unexpected musical paths. In essence, once you’ve familiarized yourself with the software, you’ll have access to any amp/effects combination you could imagine, at a fraction of the cost of having to buy the gear you are simulating digitally (and the simulations have gotten very, very good).
It’s affordable and easy to set up.
As you probably know, booking studio time to record a few songs can get very expensive (they usually charge by the hour) and time equals money, so if your goal is to track an album, the most cost-effective way to do it is by setting up a small home recording studio. The overall cost for a basic recording setup rivals the price of tracking a single song in a professional studio. But even if you treat yourself to a few studio sessions, good results are by no means guaranteed, as having to get into the right creative frame of mind can be difficult while being on a tight schedule, or contending with the studio technician who just wants to get done already so he can move on to the next booked slot.
Setting up a home recording studio is as easy as can be. All the hardware is basically plug-and-play.
It’s convenient.
Being able to record and tinker with your tracks when you feel like it, is a godsend. Working in a relaxed environment with no time constraints and no studio fees can only boost your creativity and increase your productivity.
After purchasing the basic gear, all you need to do is invest some time.
It’s flexible.
You could have your entire studio in your backpack, letting you practice or record anywhere. Being at home does have its advantages, as you are never far away from your particular comforts to help loosen you up when you hit a creative wall. But if you want to, you could just as easily get up, pack up your gear and track a few tunes on your laptop in the park.
It’s a great opportunity to learn.
If your experience up to this point is limited to playing instruments, singing, or writing music, a home studio can get you acquainted with the more technical aspects of creating music, and the know-how you acquire is not only useful while recording but also when playing live. Being able to talk to the sound engineer in a language he can understand, will result in a better sound for your band and a much less frustrating experience.
It’s relatively easy to sound professional.
If you are serious about recording your music and are not dissuaded by the learning curve, you can get pro studio sound quality out of your home recording setup. The quality and versatility of home studio gear have been steadily increasing, while the prices keep dropping. This has led to an upsurge in so-called bedroom albums, making music a lot more democratic than it used to be just a few years ago. While electronic music has benefited the most from this availability of affordable gear, there are a lot of instrumental bands that have seen great success with home recording.
Here are a few examples, if you want to check out what can be done in the comfort of your bedroom: Plini, David Maxim Micic, Helix Nebula, FKJ, Jacob Collier…
The bottom line is this: with some practice, you could record a whole album that rivals a studio-recorded one.
Wrap Up:
If you have any further questions about how to record guitar on PC please leave them in the comments below and we will reply as quickly as possible.

My name is Chris and I’ve had a passion for music and guitars for as long as I can remember. I started this website with some of my friends who are musicians, music teachers, gear heads, and music enthusiasts so we could provide high-quality guitar and music-related content.
I’ve been playing guitar since I was 13 years old and am an avid collector. Amps, pedals, guitars, bass, drums, microphones, studio, and recording gear, I love it all.
I was born and raised in Western Pennsylvania. My background is in Electrical Engineering, earning a Bachelor’s degree from Youngstown State University. With my engineering experience, I’ve developed as a designer of guitar amplifiers and effects. A true passion of mine, I’ve designed, built, and repaired a wide range of guitar amps and electronics. Here at the Guitar Lobby, our aim is to share our passion for Music and gear with the rest of the music community.