Guitar pedals are the single most transformative component in a guitarist’s rig. Although the choice of guitar and amplifier form the tonal foundation, effects pedals allow musicians to find creative ways to enhance their sound.
Since the first guitar pedals were created in the 1960s, they’ve come a long way in terms of responsiveness, reliability, and quality. The variety of guitar pedals produced today is staggeringly wide, and with every passing year, it seems that a new batch of options is made available to be slotted onto your pedalboard.
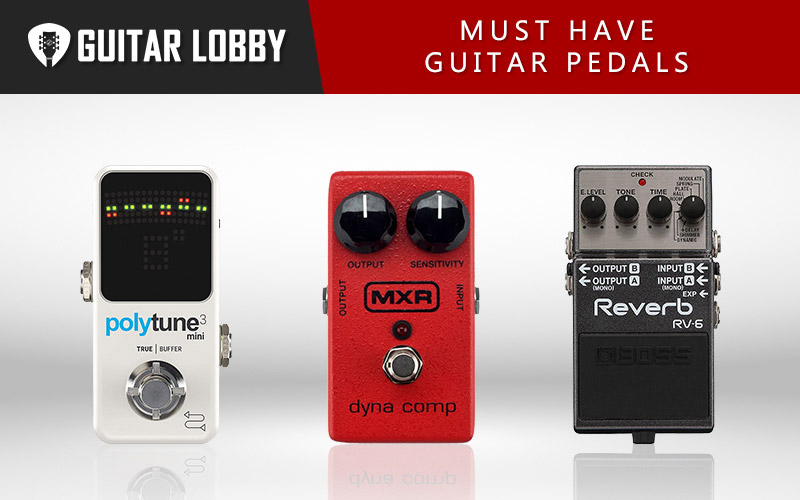
Due to the sheer number of guitar pedals out there, choosing the right kind to create your desired tones and effects can be a little overwhelming. This comprehensive guide aims to present and describe the must have guitar pedals that every guitarist should be aware of. Regardless of whether you have any prior knowledge or experience with guitar pedals, I’ll help you to expand your knowledge to the expert level. While there technically is no such thing as an essential guitar pedal, the pedals are the list are the most commonly used and versatile for a wide range of playing styles.
Table of Contents
Here is a List of Essential Guitar Pedals
1. Reverb Pedal
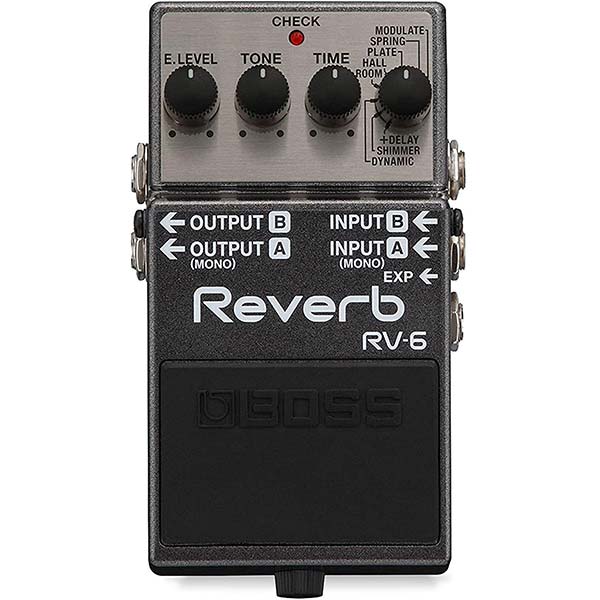
What it Does and How it Works: As digital technology has advanced considerably in the past few decades, reverb pedals have become increasingly popular amongst guitarists. Reverb is a natural effect that is caused by a sound source bouncing off a surface, then coming back after the original sound. A reverb pedal simulates this process.
There are a number of reverb types that have been developed over the years, which are incorporated into reverb pedals. Firstly, spring reverb was discovered by passing a sound through a number of springs, and sending it back into a pickup. This variety is commonly used in amplifiers to this day. Then there’s plate reverb, which is created similarly to spring, but the difference is that the springs are replaced by large metal plates, allowing for more flexibility.
Finally, the most commonly used reverb used for guitar pedals is digital reverb. This replicates all of the above varieties and provides you with the option of adjusting certain parameters that affect the sound, like decay, attack, or room size.
Reverb is known as a timing/space-based effect, alongside delay. It is used in pretty much every genre and style of music you can think of, whether that be on guitars, vocals, drums, or synthesizers. Reverb guitar pedals are especially useful for softening your tone, adding dreamy, ambient textures, and creating trippy soundscapes.
How to Use it: Using a reverb guitar pedal is easy once you establish the purpose of the various controls. Although the controls vary from pedal to pedal, there’s a staple set that you’ll find on most reverb stompboxes. The attack is used to control the speed at which the reverb becomes audible once a note is played. The lower the attack, the quicker the reverb will kick in, and vice versa. Decay performs the function of determining the length of time between the reverb starting and ending. If decay is cranked up, the reverb will last for a long, drawn-out period.
Another commonly found control on reverb guitar pedals is Level. This one is quite self-explanatory, but useful nonetheless. The level parameter oversees the volume of the reverb in comparison to your dry, unaltered signal. The final control that you are likely to encounter is Tone. The function of this control will differ depending on the pedal in question, but it affects the nature of the sound produced, for example making it sound darker, more treble-heavy, or airy.
Reverb guitar pedals are also useful tools in the recording studio, as well as in a live performance setting. When using a reverb pedal for recording, you get the pure characteristics of the particular type of reverb selected, and can directly record into your interface so that the tone of the amplifier doesn’t affect your results in any way. Although people generally position reverb pedals towards the end of the signal chain, placing them towards the front can evoke interesting results too.
The reason that it’s common to find a reverb pedal at the end of a guitarist’s chain, is that otherwise, all of the pedals that follow it will be affected and therefore the output could become muddy. Reverb is a highly compatible effect and will blend nicely with a range of other pedals, like distortion, modulation based pedals, or chorus pedals. Reverb pedals are extremely popular and are considered by many to be one of those must have guitar pedals.
Top Picks: See Our Favorite Reverb Pedals Here
2. Delay Pedal
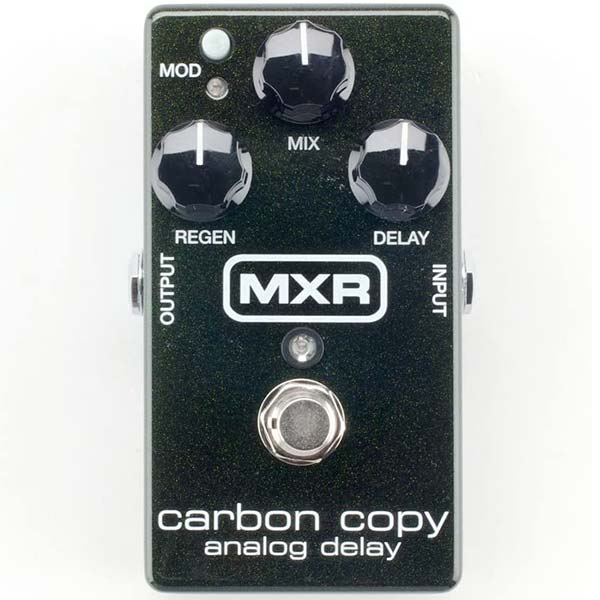
What it Does and How it Works: Delay is an instantly recognizable effect that has been used to create many iconic guitar tones over the years. A staple of most pedalboards due to its versatile nature and malleable characteristics, this type of guitar pedal can add a vintage touch to your guitar or bathe it in psychedelic ambiance.
Put simply, the delay is the sound of the exact note played on a guitar being played back shortly after the initial playing. It can be repeated infinitely, to create a series of delays. Despite its seemingly simple nature, there’s lots of room for tweaking the way the delays respond and are played back to the listener, greatly affecting the sound.
Onboard delay guitar pedals you’ll likely find three reoccurring parameters used to adjust the characteristics of the effect. These are Level, Feedback, and Time. Let’s look at each one individually.
Level affects the overall volume of the repeated signal. When this parameter is turned up, the volume of the repeated note will match that of the initial note. Turning it down makes the delayed signal more subtle. Feedback control determines the number of repeats that will be created. Turning it down will repeat in a singular delayed repeat while turning it up will produce many repeated signals. Finally, the Time control is responsible for deciding the length of time from the original note being played and the first delayed tone being produced.
How to Use it: When using a delay pedal, there is one common capability that makes the process much smoother – Tap Tempo. Because delay is a timing-based effect, it produces certain rhythms that need to be synced to the tempo of the song or piece you are playing. This is very hard to guess using rotary controls, so tap tempo is the ideal solution.
Tap tempo switches allow you to tap your foot to the beat of your desired speed, then the signal is sent to the pedal and the delay matches your rhythm. For guitarists, this makes it possible to use the same delay effect on several songs without worrying about the speed clashing and causing a sonic mess.
In terms of positioning a delay pedal in your signal chain, the rule of thumb is similar to a reverb pedal. Delay should be placed as near to the end of your signal chain as possible, to avoid the effects that come after it from being hijacked by its transformative nature. You can use delay with just about any other effect, and it’s a lot of fun to experiment with.
Using delayed guitar pedals in the studio is also a possibility. The only issue with this is that the timing of the pedal needs to be synced perfectly to the recorded track; otherwise, it will sound out of place. Again, this is achievable using a tap tempo switch. Delays also sound great on vocals, so in theory, you could re-amp vocal tracks through the delay guitar pedal for some interesting results.
Top Picks: See Our Favorite Delay Pedals Here
3. Distortion Pedal
What it Does and How it Works: Another must-have guitar pedal is distortion. This effect is sometimes produced unintentionally when an audio signal gets too loud, causing the waveform to clip and saturate. Discovered in this way by accident, it’s now been tamed into many guitar pedals that can add power and character to your tone.
Technically speaking, distortion is an umbrella term that describes any kind of saturated signal, but concerning guitar pedals, it’s an effect that is less harsh then fuzzes or overdrive. It causes your tone to break up slightly, giving it raw warmth that has long been used in rock music.
Distortion guitar pedals work by pushing the input signal of your instrument to its dynamic limits, adding gain until the sound becomes slightly crunchy. Digital distortion is the preferred choice, and this occurs by the circuitry overloading to an extent to produce the desired effect.
How to Use it: Distortion pedals are used mainly to make your guitar more prominent within a mix. They can add life to a blues riff or solo, and are also a great way to roughen up a chord sequence. In terms of compatibility with other effects, distortion works well with any other pedal that doesn’t also add too much gain to the signal.
Some amplifiers will produce natural distortion due to their tubes becoming overworked. Distortion pedals are an effective way to enhance this, but it’s important not to overdo it unless you want a very heavily saturated signal. In the recording studio, distortion pedals allow to you reproduce your live sound with the same settings. Overall, distortion is one of the most popular effects out there and certainly deserves a top spot on our discussion of essential guitar pedals.
Top Picks: See Our Favorite Distortion Pedals Here
4. Phaser Pedal
What it Does and How it Works: Popularized by none other than Jimi Hendrix in the ’60s. phaser guitar pedals are common in psychedelic rock. This is effect was created by playing a pair of tape reels simultaneously, both playing the same audio, but at slightly different speeds. This resulted in a sweeping effect that later become known as the phaser.
On a technical level, phase refers to a particular point on a frequency spectrum. An audio waveform in your DAW has several phases. When these phases are shifted, a signal is duplicated over two channels. One of these channels plays the original, unaltered signal, whilst the other is subjected to processing which adds many peaks and troughs to the waveform by cutting and boosting the frequencies using a filter.
The filter is then edited using an LFO (low-frequency oscillator), causing the guitar to move between two stages: in phase, and out of phase. As this occurs, the frequencies are produced to match up with each other, then slip back out of phase, creating the swirling phaser pedal effect.
How to Use it: Using a phaser guitar pedal is pretty straightforward once you become familiar with the parameters and their functions. The effect can be used subtly to add interesting undertones to your guitar, or more aggressively to create artificial, futuristic swirls of psychedelic phase.
The most transformative control commonly found on a phaser guitar pedal is the Speed parameter. This is sometimes labeled as Rate, but it means the same thing. The Speed or Rate control adjusts the pace of the LFO. When used on a low setting, there’s a gradual rotating effect, but when it’s cranked up, your guitar swirls with more aggression.
When positioning a phaser pedal in your signal chain, there’s a tried and trusted method to follow. Phaser guitar pedals fall into the category of modulation effects, and therefore, it’s best to position them somewhere near the end of your signal chain. The only guitar pedals that should be placed after modulation effects are timing-based pedals, like the aforementioned reverb and delay.
This results in all of the pedals that precede the phaser being affected by it. This is desirable because phaser guitar pedals interact beautifully with distortion pedals, and they are enhanced by dynamic pedals like EQ, and compressors. It’s also common to see guitarists integrate modulation effects like a phaser pedal into the effects loop of your amplifier. This is recommended because it means that the purest version of your clean signal is subjected to the modulation, without influence from other effects.
Top Picks: See Our Favorite Phaser Pedals Here
5. EQ Pedal
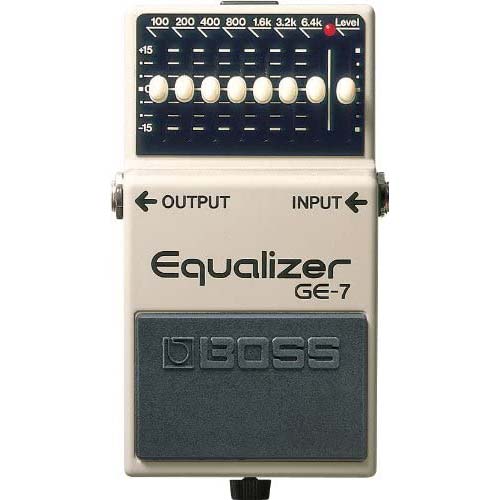
What it Does and How it Works: Most recorded pieces of music will feature EQ in some form or another. Short for equalization, this effect is used to tweak the frequencies that are present in a sound. EQ guitar pedals allow us to reduce the presence of any unwanted or harsh frequencies, or give the “sweet spots” of our instrument a boost.
There are many varieties of EQ guitar pedals, but they all essentially perform the same function. The main difference is the number of bands that are available for a musician to edit the frequency responses of their guitar. Bands refer to a group of frequencies. To simplify this, a 3-band EQ would have Bass, Mid, and Treble bands. By adjusting the levels of each band, the sound either loses power or gains power in those frequency ranges.
EQ guitar pedals provide guitarists with a viable way to make sure their instrument occupies a space within the mix of a band. For example, if a bass guitar occupies the low-end frequency range of around 200Hz – 600Hz, a guitarist may take some of this frequency band out of their output, so that the two instruments aren’t competing in that area. Likewise, the guitar’s “sweet spot” may be around 1200Hz, and therefore a slight boost to those frequencies would magnify that sonic area.
How to Use it: When using a guitar EQ pedal, it’s quite pointless to adjust the frequencies of your instrument singularly, without placing it into the context of your band/backing tracks. The reason for this is that although you may make your guitar sound “better” by tailoring the EQ frequency bands, as soon as you start playing with other instruments it’s likely that their frequencies will clash with the guitar. So using an EQ pedal whilst playing with your full band or setup is advisable.
Effectively, an EQ guitar pedal can be used in one of two ways. Firstly, you could use a method known as Subtractive EQ. This technique consists of taking frequencies out to create the illusion that other frequencies have been boosted when actually, it’s just that more attention has been drawn to them due to the lack of the reduced frequencies. This is useful because it minimizes the risk of unwanted noise being created from frequencies being boosted by the EQ pedal. Additive EQ performs the opposite function but can cause noise problems.
EQ pedals should always be placed as close to the front of your signal chain as possible, like all dynamic-based effects. This means that your clean tone is subjected to the equalization, then any pedals coming after it in the chain can remain consistent with the EQ pedal’s output.
Using an EQ guitar pedal in the studio is a great way to ensure that your recordings don’t feature any harsh tones or undesirable frequencies. Although most engineers will use digital EQ within their DAW, combining the two is a great way to make sure the audio sounds good going into the desk and then coming out of the speakers.
Top Picks: See Our Favorite EQ Pedals Here
6. Overdrive Pedal
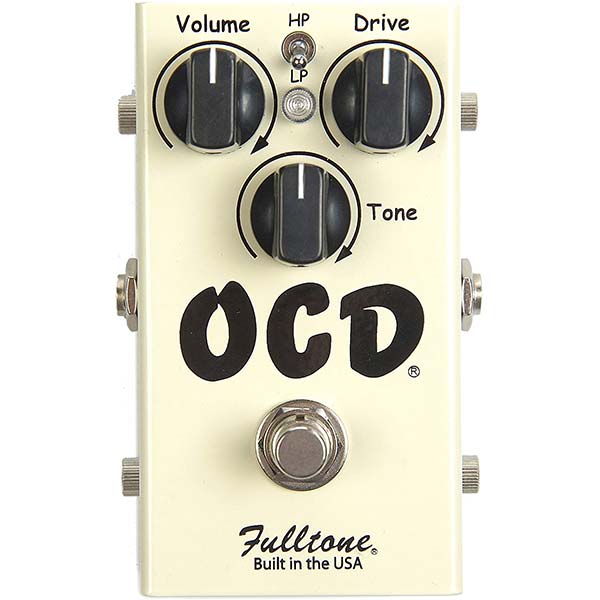
What it Does and How it Works: Overdrive guitar pedals fall into the category of distortion-based effects. It essentially pushes the dynamics of an audio signal, causing a notable amount of saturation to occur, and results in a warm break-up that sounds more extreme than a distortion pedal.
Overdrive pedals respond to the velocity of your playing. When you strike a string more aggressively, the overdriven effect becomes more prominent, and the sound crunches accordingly. This also causes an increase in volume.
Adding an overdrive guitar pedal to your pedalboard provides you with a quick way to rise above the rest of the mix, for a solo or prominent guitar part. It’s an effect that’s used by most rock guitarists, especially if they play lead parts often.
How to Use it: Overdrive guitar pedals are most effective when combined with an amplifier’s distortion channel. In heavier styles of music, the overdrive pedal is used to focus on a guitarist’s output. Setting the gain on the pedal to be fairly low will add warm undertones to a guitar track, without obliterating your signal.
The great thing about overdrive guitar pedals is that they work well with most other effects, especially when used subtly. Where you position the pedal in your signal chain is a matter of personal preference, but again this depends on the way you intend to use overdrive. If your tone is always going to have a slight amount of overdrive present, then placing the pedal towards the front of the chain is the best option. However, if you have other effects pedals that you would rather not be affected by overdrive, you should position it after those in the signal chain.
Using an overdrive in the recording studio allows you to predetermine the amount of saturation you want to subject your guitar tone to, and as a result, create consistency between your on-stage tone and your studio tone. Whether you use the pedal going straight into a direct input or blend it with the natural overdrive of a tube amp will have a large impact on its performance.
Top Picks: See Our Favorite Overdrive Pedals Here
7. Octave Pedal
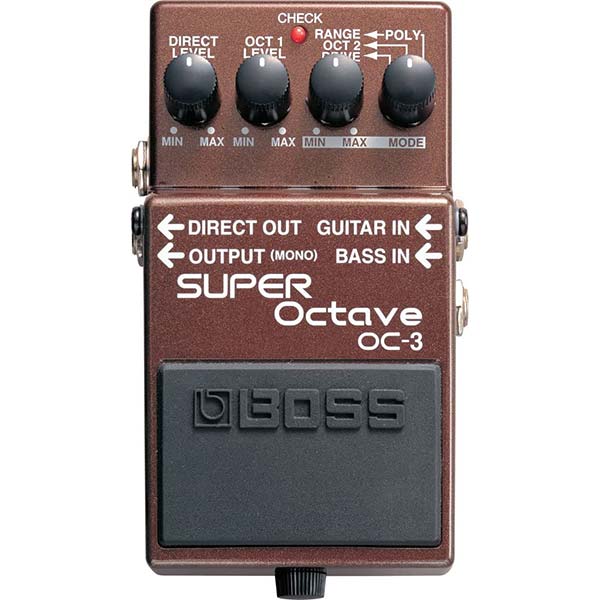
What it Does and How it Works: Octave guitar pedals provide guitarists with an easy way to add harmonic layers to their tones. They work by using pitch-shifting, which means the original sound source is replicated after the pitch has been modified to be many octaves higher or lower than the original. An octave is an interval of eight notes.
At the heart of an octave guitar pedal is a process known as tracking. For a pitch-shifter to work effectively, it must have the capacity to detect the signal from your guitar with pinpoint accuracy. Digital tracking is commonly found on octave pedals, due to its precision when tracking the signal. Analog tracking is less predictable and causes some unique tones to occur during the pitch-shifting process.
How to Use it: The most common use for an octave guitar pedal is to create the illusion that a bass guitar is playing along with the original track. This effect is achieved by setting the pedal to play both the original octave and the sub-octave, resulting in a thicker, more bass-heavy output.
These guitar pedals are also great for adding higher frequencies to the guitar, that on its own, it would be incapable of producing. By adding higher octaves to the original, the guitar starts to take on organ-like qualities.
Ideally, an octave guitar pedal should be placed towards the front of your signal chain, after only the tuner and dynamic-based pedals such as EQ and compressors. This makes it easier for the octave pedal to accurately track your signal, resulting in a cleaner sound. When octave pedals are used with distortion based pedals, they can transform your guitar into a completely different animal, adding power, grit, and thickness to your tone.
Using an octave pedal in the recording studio can be an interesting method to create unique tones from your guitar. There’s plenty of room for maneuver with these pitch-shifting pedals, so you can play around to discover new tones that you didn’t know could be created with an electric guitar.
Top Picks: See Our Favorite Octave Pedals Here
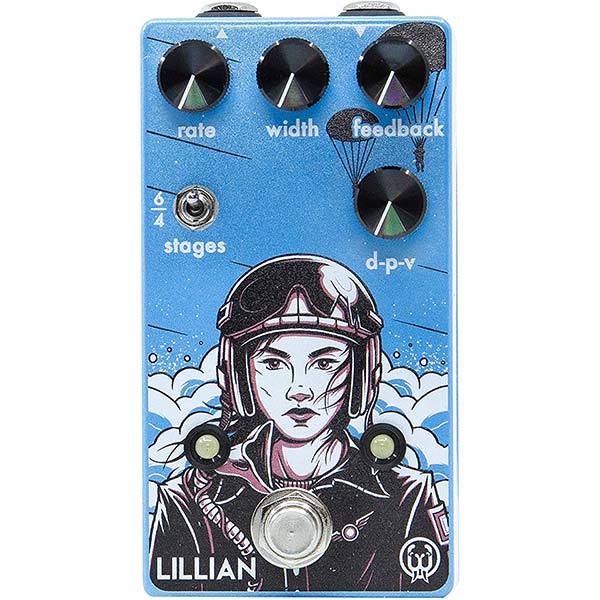
8. Flanger Pedal
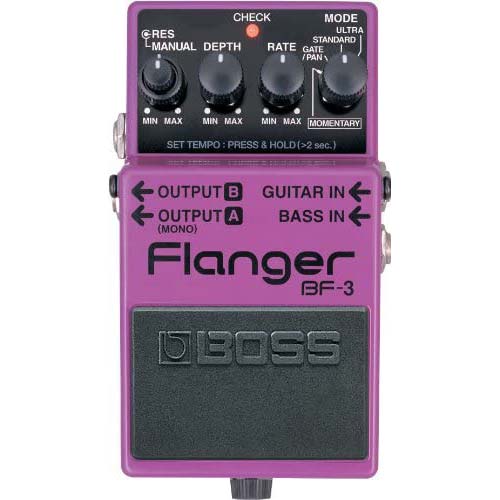
What it Does and How it Works: Flangers work in a very similar way to phasers, but the effect that they produce is distinctively individual. A flanger guitar pedal works by creating a carbon-copy of the original signal, then playing it back delayed. The time that the copied signal is delayed greatly affects the characteristics of the flange effect.
As with a phaser guitar pedal, flangers use an LFO to adjust the various attributes. The harmonics between the two signals are caused to interact with each other, sweeping across the frequency spectrum and creating the iconic sound that has been featured on many recordings since its discovery in the 60s.
Another way that a flanger guitar pedal can be utilized is by sending the output from the pedal back into the input, creating a feedback loop. This causes the sound to become multi-dimensional and opens up the door to a new plethora of sonic possibilities.
How to Use it: Flanger guitar pedals contain three staple controls that greatly influence the prominence and characteristic of the effect. Firstly, there’s the Feedback parameter. This controls the amount of the outputted signal that is then sent back into the input of the pedal, creating feedback, and adding unpredictable tones to the sound.
Depth is used to affect the wet/dry ratio of the pedal. If this parameter is turned up high, the signal will be subjected to a lot of flanges, and your tone will be dramatically transformed. If it’s set lower, the effect will be less noticeable. Finally, the Rate control is used to alter the speed of which the LFO filter creates signal delays.
Flanger pedals, like all modulation pedals, should be positioned towards the back of your signal chain. Preferably, they should be placed after all pedals except for space/timing based effects, like reverb and delay. However, modulation based effects can also produce some interesting results when you tear up the rulebook and experiment!
Using flanger guitar pedals for recordings is a great way to add color to your clean tone. The only issue with using them straight into the DI of your audio interface is that you might notice some imperfections creeping in that perhaps the amplifier masks in a live setting, so recording it through an amp may be a better option.
Top Picks: See Our Favorite Flanger Pedals Here
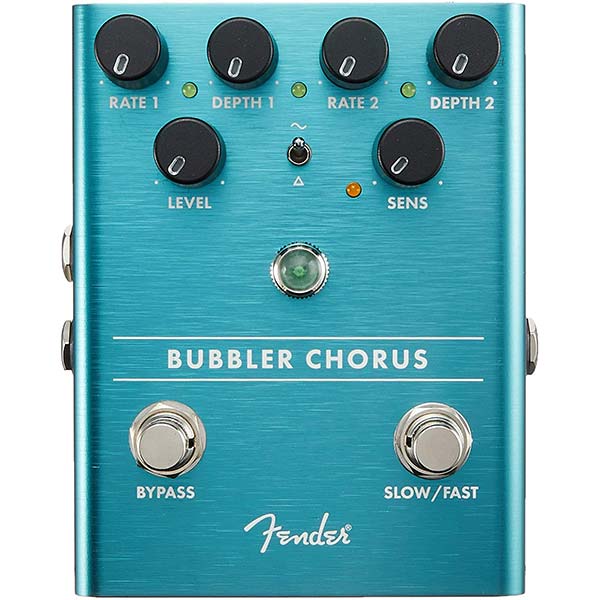
9. Chorus Pedal
What it Does and How it Works: Another modulation-based effect, the chorus has been used to produce some incredible guitar tones over the years. Kurt Cobain’s guitar was often bathed in the chorus, producing his signature slightly “off” sound that defined a generation.
Similar to phase and flange, a chorus guitar pedal produces its effect by duplicating your signal. One of the signals remains true to the original and unaltered, while the other one is delayed slightly and detuned. Again this is achieved through the use of an LFO.
The main difference between chorus pedals and their phase/flange counterparts is that the chorus features some modulation to the pitch of the original audio, rather than solely the timing aspects. The detuned sound is what makes the chorus distinctive and intriguing to guitarists.
How to Use it: Much like other modulation-based pedals, chorus pedals are controlled by a trio of parameters: Level, Depth, and Rate. If you turn up the level control, then more of the wet signal will be present in your overall output. The depth control makes the effect more or less intense, adding the famed chorus warble to your tone. Finally, the rate parameter decides the speed of the LFO’s rotation.
Positioning a chorus guitar pedal in your signal chain is a subjective matter, but the generally accepted rule amongst most guitarists is that it should slot in just before any delay or reverb pedals. However, as I previously touched upon when describing the placement of phaser and flanger pedals, experimenting with these modulation-effects is a great way to create innovative tones that are unique to you.
Top Picks: See Our Favorite Chorus Pedals Here
10. Compressor Pedal
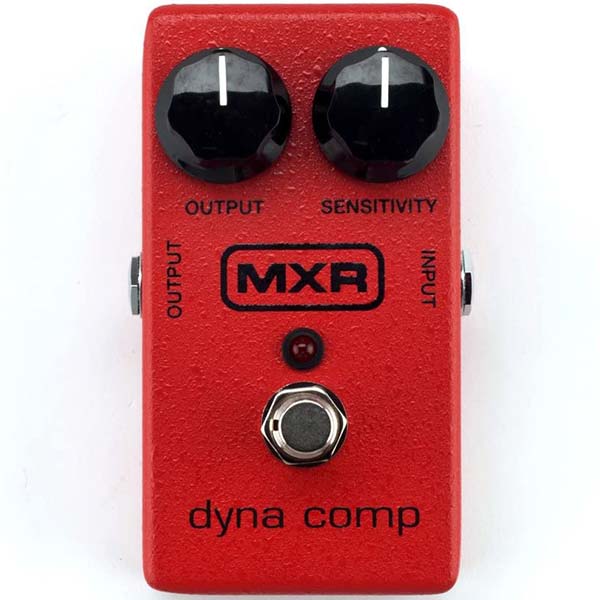
What it Does and How it Works: Arguably one of the most important components of a guitarist’s pedalboard, compressor pedals is responsible for controlling the dynamics of your entire rig. Compression is widely used on all instruments and vocal tracks, and it essentially reduces the dynamic range of an audio wave.
Compressor guitar pedals work by boosting the notes that fall below a certain volume and reducing the notes that reach above a certain volume, to create a more evenly balanced output. The result is a smooth sounding guitar tone that doesn’t spike or dip unexpectedly.
How to Use it: Unlike some guitar pedals that are subjective in terms of what they can be used for, a compressor pedal only has one use – to make the dynamics of your instrument more consistent. That’s not to say that it can’t produce varying effects.
Compressors commonly have four parameters that greatly adjust the pedal’s impact on your guitar. First of all, the Threshold sets the level at which the compression kicks in, and can be used to completely squash the audio or let it breathe whilst gently compressing it. The ratio consists of two numbers which refer to the amount of compression that any notes that cross the threshold are subjected to. For example, a ratio of 2:1 would result in gentle compression, whereas 10:1 would drastically reduce the dynamic range.
Attack and Release controls adjust the time it takes for the compression to kick in, and the amount of time after the note has been played that the compression is present for, respectively. It’s a good idea to position a compressor guitar pedal in your signal chain right at the front, after only a tuner pedal. Compression doesn’t work very well anywhere else, because the other pedals will cause the compression to become scattered and less focused if it is positioned after them in the chain. Compressor pedals definitely deserve a spot on this list of must have guitar pedals.
Top Picks: See Our Favorite Compression Pedals Here
11. Fuzz Pedal
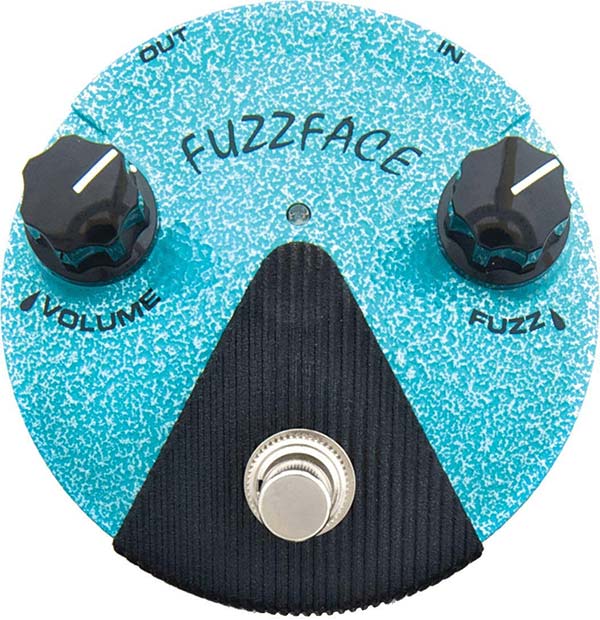
What it Does and How it Works: Fuzz, like distortion and overdrive, works by saturating your guitar’s signal until clipping occurs. The difference between a fuzz pedal and the other two distortion-based effects is that fuzz is much more extreme in terms of saturation and tone.
Fuzz was originally discovered when a Nashville guitarist recorded his guitar through a broken preamp way back in the early 60s. This obliterated the tone of his instrument, causing it to break-up and thus, fuzz was born.
We can think of dirt-based pedals as being on three levels: firstly, you have the gentle, warm breakups of distortion, caused naturally by the tubes in an amplifier being overworked. Then comes overdrive, which is harsher than distortion but still responds to the dynamics of your playing. Fuzz is the most aggressive of the three, with clipping so extreme that no matter how hard or soft you play, the dynamics remain the same.
How to Use it: Fuzz guitar pedals are used mainly for parts where the guitar becomes the main focus of a song, such as a blistering solo or a stomping low-end riff. You would rarely use fuzz on chords because it makes the sound unclear and chaotic.
As with distortion and overdrive pedals, where you position a fuzz pedal depends on what results you’re looking for. The one rule to follow is, if you are using a buffer pedal in your signal chain, always position the fuzz pedal before it. This is because fuzz pedals offer low-impedance, which causes the guitar signal and the inner circuitry of the fuzz pedal to interact. A buffer would interfere with this process, so it’s important to try and get your fuzz pedal as early in the chain as possible.
Fuzz pedals can be used in conjunction with any other pedal, as long as it’s not a gain booster or another distortion-based stompbox. They sound especially great when combined with a wah-wah pedal, adding power and grit to the filtered output. Fuzz pedals definitely deserve a spot on our list of essential effects pedals.
Top Picks: See Our Favorite Fuzz Pedals Here
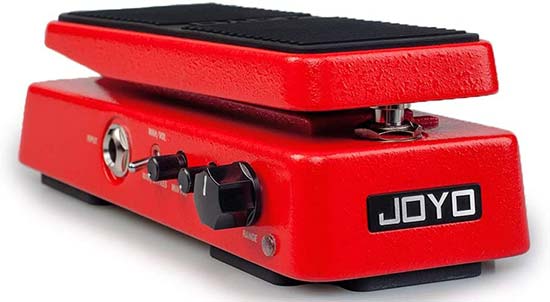
12. Wah Pedal
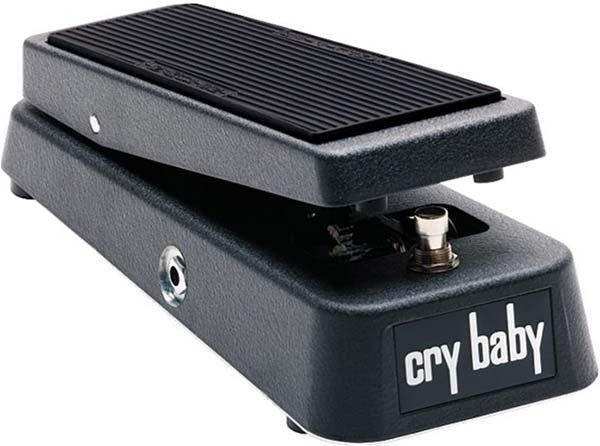
What it Does and How it Works: I’m going to make a bold statement and say that Wah pedals are my favorite guitar effect on this list. That could be down to the fact I’m a huge Hendrix fan, but it’s also due to the unique and irresistible way that they interact with a guitar.
Wah-wah guitar pedals are essentially filters. It works by moving the peak of your guitar’s signal, much like a real-time, automated EQ. This allows you to open and close the filter as quickly or slowly as you desire, creating the “wah-wah” sound.
Wah pedals are controlled like an expression pedal, using your foot to push forwards or lean backward, and in turn, opening or closing the filter. This moves the rocking plate inside the pedal, and changes the voltage, affecting the tone it produces, allowing you to rhythmically control the effect and match it up to the tempo of a song.
How to Use it: Wah pedals are versatile and can be used for various purposes. The most common way to use these pedals is by activating them during a guitar solo because the added mid-range and higher frequencies make the guitar stand out more.
They can also be used more subtly, by slowly adjusting the angle of the pedal, it acts as a gradual filter opening. This is useful for breakdowns in songs or sections where you are trying to build tension. Wah-wah guitar pedals are invaluable tools in the recording studio. It’s one of the rare effects that can’t be authentically reproduced using digital software, so having one present when recording is a must if you use one live.
When choosing where to position a wah pedal in your signal chain, I would recommend integrating as early as possible, before everything barring your tuner. This is because you want the wah pedal to affect the signal before it is subjected to distortion or modulation based pedals, to create the cleanest possible sound.
Top Picks: See Our Favorite Wah Pedals Here
13. Tremolo Pedal
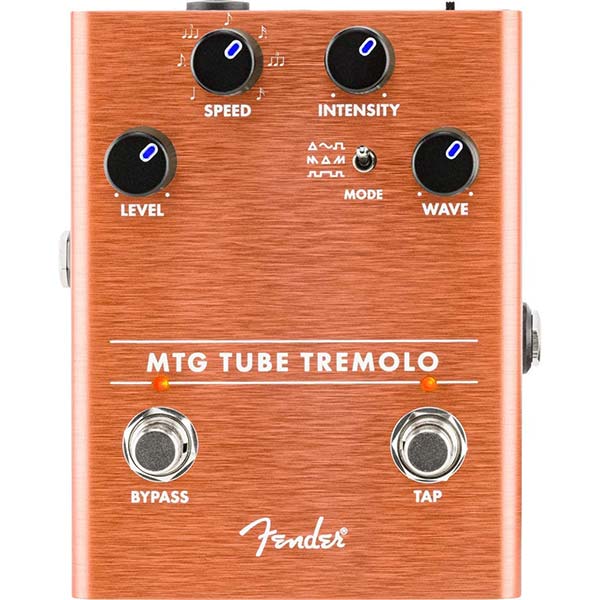
What it Does and How it Works: You’ve probably heard tremolo effects on early rock n’ roll or surf rock recording, or perhaps your amplifier has a dedicated tremolo channel. Often paired with vibrato, this effect is popular for its ability to produce ear-friendly wobbles that can bring a dull guitar tone to life.
Discussing the technicalities, tremolo is produced by a gentle increase and decrease in volume. This is where it differs from vibration, which is caused by a subtle increase and decrease in pitch. The changes in volume create tremors in the audio, creating movement and expression.
How to Use it: Tremolo pedals will often have a limited number of controls that can change the characteristics of the effect. The main one to be aware of is the Rate control, which alters the speed that the dynamic peaks and troughs occur at. Some tremolo guitar pedals come with Tap Temp so that you can perfectly match the speed to that of the song you are playing.
Tremolo and vibrato pedals are versatile when it comes to placing them in your signal chain. They are fairly unobtrusive effects and therefore won’t have much of an impact on the pedals that come after them. One thing to take note of is that you should never place a tremolo guitar pedalo before a compressor, as it will attempt to counteract the diminishes in volume and be rendered useless.
Many guitarists prefer to use tremolo from an amplifier in the studio, as it is considered to be a “purer” form than the sound produced by a pedal. This may be true, but if you don’t have access to a tube-amp with tremolo-producing abilities, a pedal is an inexpensive solution.
Top Picks: See Our Favorite Tremolo Pedals Here
14. Noise Gate Pedal
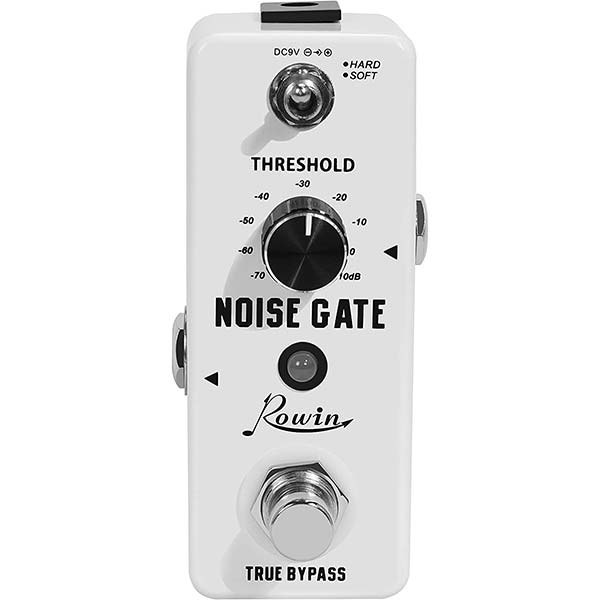
What it Does and How it Works: Noise Gate pedals are particularly useful if you have a high-gain amplifier or a guitar with single-coil pickups that are prone to being noisy. Electronic hum and buzzing sounds are inevitable when using effects pedals, and a noise gate provides a practical way to minimize their prominence.
Noise gate pedals create a gate that blocks certain frequencies from entering into your output. It does this by setting a certain threshold and triggering the gate to open when the level of your guitar surpasses that threshold. It then closes when the volume drops below, so you have complete control of which sounds are present.
It’s common to find noise gate guitar pedals on the pedalboards of high-gain enthusiasts like metal, heavy-rock, or prog-rock musicians. Players of these genres need extreme levels of gain and distortion but also want their tone to remain focused and sharp.
How to Use it: Noise gate pedals are based around three basic controls: Threshold, Reduction, and Decay. The threshold parameter is used to adjust at what point the gate opens and closes. If you were to set the threshold to a low value, it would cut out most of the signal and only let a limited number of sounds through. Reduction decides how much the signal that has passed through the gate is reduced in volume. Decay determines the time it takes for the gate to close once it’s been opened, and how much your guitar can “breathe” before being cut off.
Noise gate pedals don’t have a particular spot in a signal chain, and I’d encourage you to experiment to find the right placement to suit your style. With that being said, it’s wise to put it after any pedals that cause unwanted noise, otherwise, it won’t be able to gate them and minimize the hum or buzz.
You would rarely need to use a noise gate in the studio unless you are recording with your full guitar rig and pedalboard. If you are recording straight into the interface, you can use VST plugins and EQ to remove any unwanted frequencies during the mixing process.
Top Picks: See Our Favorite Noise Gate Pedals Here
15. Volume Pedal
What it Does and How it Works: A volume pedal may not be the most exciting addition you can make to your guitar rig, but it performs an essential function nonetheless. These pedals can be assigned to control many different functions on your pedalboard. The most common usage is to control the master volume of your guitar.
Volume pedals come in two varieties: active and passive. The former is the most commonly used because it contains a buffer that prevents signal loss from occurring. Passive volume pedals, on the other hand, don’t contain any inner circuitry and therefore can be more unpredictable.
How to Use it: Using a volume pedal is very simple. Similar to an expression pedal, it is controlled with a rocking plate on a pedal which, when moved back and forth, adjusts the volume of your guitar. It can be used to completely mute your instrument, or slightly tweak the dynamics to match the rest of your band. Alternatively, you can use it to gradually increase or decrease the volume, producing a fade-in/fade-out effect.
Volume pedals can be placed in one of three positions in your signal chain. Firstly, if you place it at the very front, it will simply perform the function of controlling the volume of only your guitar, like the volume pot that is probably already present on your instrument. If the pedal is placed in the center of your chain, just after any distortion-based effects and before modulation, it allows you to control the level of the distorted pedals and ensure that it matches the rest of the band. Finally, if you place the volume pedal at the very end of your signal chain, it can then be used to control the volume of every single pedal.
Using a volume pedal in the recording studio isn’t necessary, but one thing that they do come in handy for is assigning them to different functions within your DAW. For example, you could assign the volume pedal to affect the threshold of a compressor or the decay of the reverb, and adjust it in real-time.
Top Picks: See Our Favorite Volume Pedals Here
16. Synth Pedal
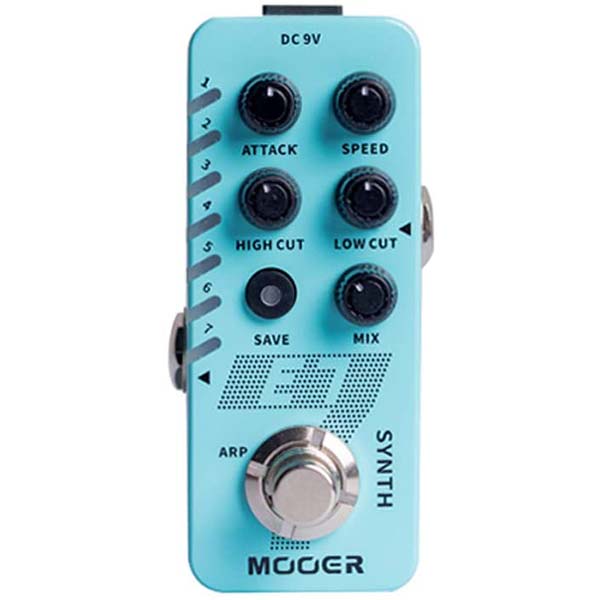
What it Does and How it Works: Guitar synth pedals completely transform your instrument into an almost unrecognizable hybrid, blending the world of rock and electronic music. Not for the faint-hearted, synth pedals are a great way to experiment and inspire yourself to be more creative.
Synth pedals work by detecting the pitch of your guitar’s original signal, then activating an oscillator, and altering the tuning properties. This means that the synth sound is produced by an actual synthesizer circuit within the pedal, creating authentic results.
The popularity of synth pedals is due to the tonal flexibility they provide. With many onboard parameters that resemble those present on a genuine synthesizer, they can revolutionize the sound of your guitar instantaneously.
How to Use it: Synth pedals vary greatly in terms of their detail and ability, but generally speaking, you use a series of controls to alter the characteristics of the pedal. It’s very common to find ready-made presets on synth pedals that are based on classic synthesizers used in electronic styles of music. There’s also usually slots for saving your settings and creating unique tones.
When positioning a synth pedal in your signal chain, it helps to class it as a filter pedal. To get the best results, you should place it as near to the beginning of your chain as possible, but note before a tuner or compressor. This allows the pedal to interact with a pure version of your clean tone, and not be marred by other pedal’s influences.
When recording, a synth pedal can provide you with sounds that you simply can’t recreate any other way. The blend of guitar and synth is unique to each pedal, and although it’s fairly easy to record the two separately, using a synth pedal creates a very individual hybrid.
Top Picks: See Our Favorite Synth Pedals Here
17. Tuner Pedal
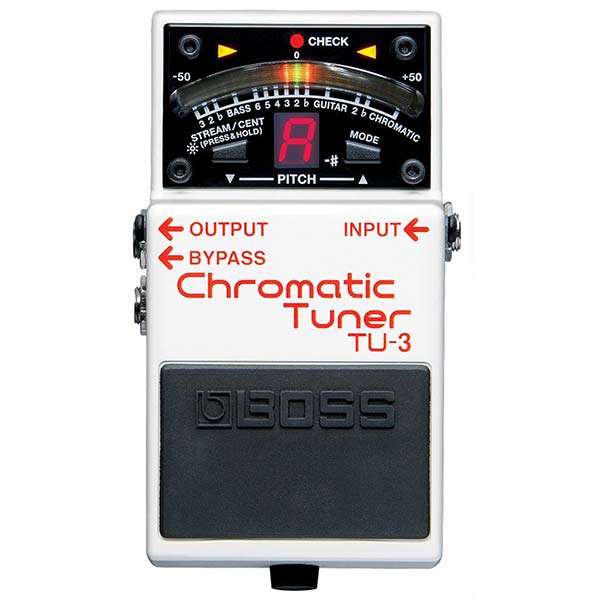
What it Does and How it Works: To conclude this guide of must has guitar pedals, we have the unsung hero of all pedalboards – the tuner pedal! Admittedly, it’s not quite as exciting as a fuzz or wah pedal, but without a decent tuner, your whole performance could fall apart.
A guitar tuner pedal is used to match your tuning to a certain pitch. Most are based around what is considered to be the standard frequency for music, 440Hz, and this exists so that all of the instruments in a band or ensemble can play in tune with each other.
How to Use it: Tuners are amongst the simplest guitar pedals to use. You simply plug into the input, play a string once, and then depending on the reading that the tuner provides, turn your tuning pegs accordingly until it is bang in tune with your desired note.
Tuners should always be placed at the very front of your signal chain because they don’t produce an effect, and you want the signal to be as clean as possible when it enters the pedal so that it doesn’t confuse the pitch detection. To many, tuner pedals are considered to be one of those essential guitar pedals.
Top Picks: See Our Favorite Tuner Pedals Here
More Tips on Choosing the Right Guitar Pedal for You:
Now that we’ve covered the must-have guitar pedals, you might be thinking, how do I know which ones I should choose?
To answer that question, you need to establish the style of guitar that you will predominantly be playing. Having a sound in mind before you purchase pedals is the best way to ensure that you don’t end up with a mixture of effects that don’t produce your desired results. A great way to establish which pedals are right for you is by singling out guitar tones that you would like to replicate.
You can then do some research into the artist in question, find out what made up their guitar rig and which pedals they were using to produce the effect that you are fond of. Then, you know exactly which style of the pedal to go for to get their results. If you repeat this with a few guitarists, you can mix and match their tools and come up with your unique blends.
Final Thoughts:
Guitar pedals are a lot of fun to experiment with, and they provide us with a great resource for learning about the mechanics of sound and audio processing. Whenever you get a new pedal, it’s important to take some time to get to know it properly and understand exactly how it works. This will then help you in the future when you decide to expand your rig further.

My name is Chris and I’ve had a passion for music and guitars for as long as I can remember. I started this website with some of my friends who are musicians, music teachers, gear heads, and music enthusiasts so we could provide high-quality guitar and music-related content.
I’ve been playing guitar since I was 13 years old and am an avid collector. Amps, pedals, guitars, bass, drums, microphones, studio, and recording gear, I love it all.
I was born and raised in Western Pennsylvania. My background is in Electrical Engineering, earning a Bachelor’s degree from Youngstown State University. With my engineering experience, I’ve developed as a designer of guitar amplifiers and effects. A true passion of mine, I’ve designed, built, and repaired a wide range of guitar amps and electronics. Here at the Guitar Lobby, our aim is to share our passion for Music and gear with the rest of the music community.