As music technology has advanced in recent decades, the range of guitar pedals available to musicians has increased exponentially. In some cases, the original, vintage pedals still dominate certain effects. Other instances have seen modern digital pedals grow in popularity.
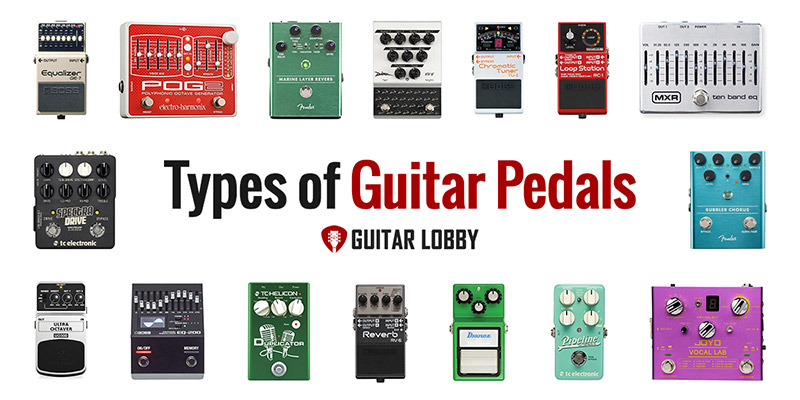
When assembling your pedalboard, it’s important to have an understanding of the various types of guitar pedals. The effects that you choose to integrate into your signal chain will massively impact your overall tone and open up an array of new, sound-sculpting opportunities.
In this ultimate guide, we’ll take a detailed look at each type of guitar pedal. After reading the following sections, you’ll understand the effect that each pedal produces, its main functions, and the styles of playing that it is best suited to.
Table of Contents
- Here Are the Different Types of Guitar Pedals
- 1. EQ
- 2. Wah-Wah
- 3. Talk Box
- 4. Envelope Filter (Auto-Wah)
- 5. Distortion
- 6. Overdrive
- 7. Fuzz
- 8. Octaver
- 9. Pitch Shifter
- 10. Tuner
- 11. Harmonizer
- 12. Phaser
- 13. Flanger
- 14. Chorus
- 15. Tremolo & Vibrato
- 16. Compressor
- 17. Sustain
- 18. Volume Pedal
- 19. Envelope
- 20. Noise gate
- 21. Reverb
- 22. Delay
- 23. Looper
- Guitar Pedals – Essential Information
- How Should You Position Your Pedals in a Signal Chain?
- Recording With Effects Pedals
- Inputs/Outputs
- Powering Your Pedals
- Multi-Effects Pedals
- VST Plugins vs. Guitar Pedals
- True Bypass/Buffered Guitar Pedals
Here Are the Different Types of Guitar Pedals
First Category: Filter Guitar Pedals
Firstly, we have guitar pedals that fall into the filter effects category. These pedals work by causing the frequency output of an audio signal to be altered. They achieve this by either weakening or boosting specific frequency bands or regions.
Below you can see the guitar pedals that are classed as filter effects.
1. EQ
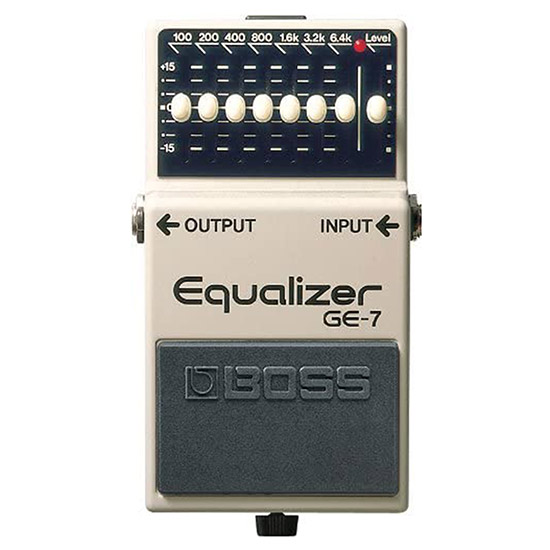
EQ, or equalization, is a term that describes the full spectrum of sound. An EQ pedal works by allowing you to boost or remove several groups of frequencies, commonly known as bands. Some pedals offer 3-band EQ, which means you can adjust the bass, mid and treble frequencies. More advanced EQ pedals offer 8 or even 16 bands, allowing you to be precise with the settings.
You’ve probably used EQ when adjusting the sound of a car stereo or home audio system before. Most of these devices allow you to adjust the presence of the low, mid, and high-end frequency ranges to tailor the overall sound.
EQ pedals perform the same function, but for your guitar. The instrument has its unique frequency output, and certain tones will naturally be more prominent than others. Using an EQ pedal gives you the platform to smoothen out the frequency output of the guitar, removing any harsh, unwanted tones, and boosting the “sweet spots” to draw more attention to those frequencies.
Two of the best EQ pedals on the market are the BOSS GE-7 and the M190S by MXR.
2. Wah-Wah
If you’re a fan of rock music, you’ve likely heard the iconic, instantly recognizable sound of Jimi Hendrix’s wailing guitar tone. The wah-wah pedal was a fundamental aspect of his playing style. It is operated using a rocker plate mechanism, where the guitarist motions their foot back and forth to open and close a filter.
Although the sound produced by a wah pedal sounds complex, the way that it works is pretty simple. Inside the pedal, there is a device called a potentiometer, which divides the voltage level when it is adjusted. This is connected to the rocker plate which the guitarist moves back and forth with their foot, causing the voltage to change and the frequency output to sweep.
Wah-wah pedals are extremely fun to experiment with. They can be used to create a wide array of tones, and when combined with other effects pedals things can get interesting. They are used in a variety of genres and continue to be one of the most popular guitar pedals over half a century since their inception.
The classic CryBaby Wah by Dunlop is one of the most popular options.
3. Talk Box
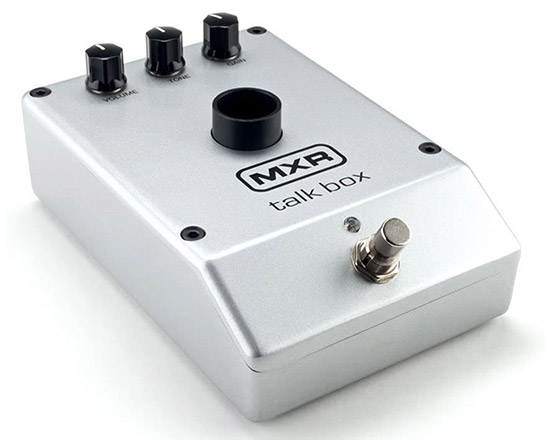
Another guitar pedal that is part of the filter effects family is the unique-sounding talk box. This pedal is placed on the floor and includes a speaker that is attached to a plastic tube. The connection must be completely airtight for the pedal to work effectively.
Many guitarists make their own DIY talk box pedals, as they are fairly easy to build. The talkbox has connectors installed so that it can be hooked up to a guitar and amplifier. Then, a footswitch allows the guitarist to control whether the sound is directed to the talk box speaker or the external speaker. The other end of the plastic tube is attached to a microphone so that the guitarist can reach it with their mouth.
When it is activated, the sound from the amplifier gets reproduced by the inbuilt speaker and is directed up through the tube into the mouth of the guitarist. By changing the shape of their mouth, the guitarist causes the frequency output of the pedal to change, thus creating a unique effect that sounds like the guitar is talking.
4. Envelope Filter (Auto-Wah)
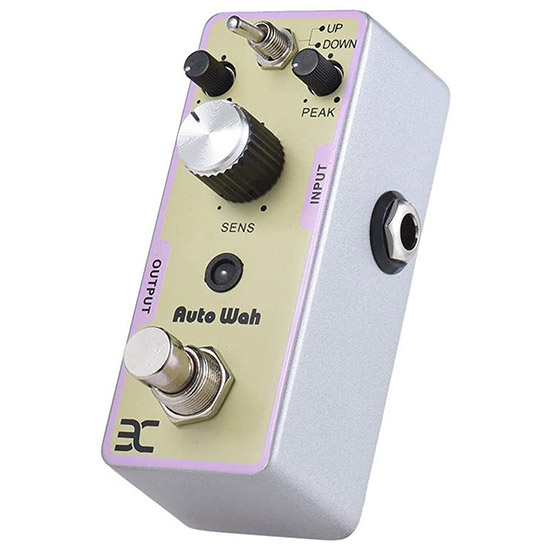
Envelope filter pedals work similarly to wah pedals, except rather than being controlled by the motion of the guitarist’s foot; they react to the dynamics and attack of your playing and automatically add or remove certain frequencies.
These guitar pedals often house parameters that allow the guitarist to predetermine the way they interact with their playing. The advantage of using an envelope filter over a conventional wah pedal is that you don’t need to think about the rhythmic aspect to get the same effect.
Second Category: Gain Guitar Pedals
Guitar pedals that fall under the gain umbrella are used to add warmth to the instrument’s tone. They do this by saturating the audio signal, causing it to clip and distort the shape of the waveform. This process adds colorful overtones.
5. Distortion
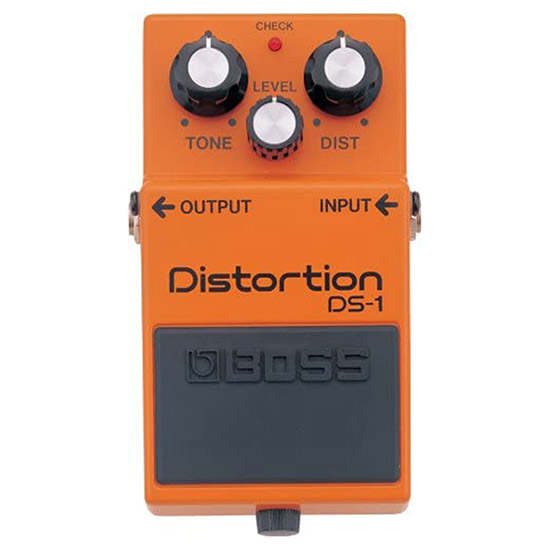
Distortion guitar pedals add gain to the signal, pushing it beyond its peak. This results in harmonic overtones being creates, and the peaks and troughs of the signal clips. The sound becomes compressed and sustain is also enhanced.
Distortion pedals are common in heavier styles of music such as metal and hard rock. They provide a useful way for guitarists to cut through the mix, standing out from the rest of the band when playing a solo or a particular riff.
The term distortion is used to describe the process of causing an audio signal to clip by increasing gain. However, it also describes a select group of pedals that differ from overdrive and fuzz, even though the latter pair are technically distortion pedals.
The RAT2 by Pro Co is a fine example of a distortion pedal.
6. Overdrive
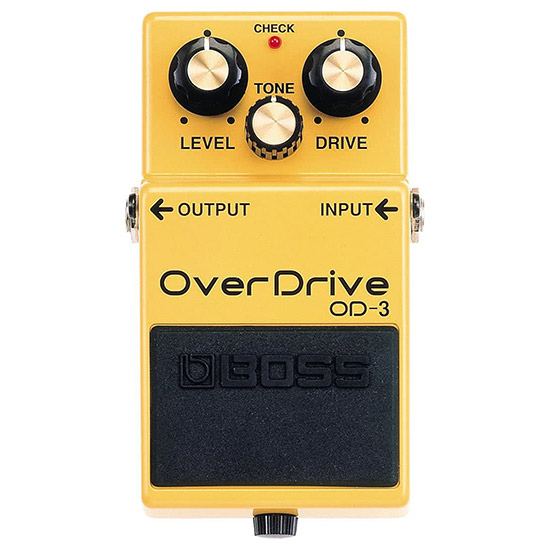
Overdrive pedals work in the same way as distortion pedals, but they produce a distinctive sound of their own. They work by adding a layer of grit to the guitar’s tone, by pushing the clean tone slightly into saturation. This effect is produced by valve amplifiers when the inner tubes overheat slightly.
Throughout the history of the electric guitar, overdrive is one of the most used effects. It is favored by musicians across multiple genres because it doesn’t completely obliterate the signal like some more extreme gain-based effects do, but rather coats it in a warm and immersive layer of slight distortion.
Overdrive pedals commonly feature gain, tone, and level controls. This trio of parameters can be used to make the effect more prominent, or subtle, depending on the requirements of the individual. It’s a great pedal for adding character to a lead guitar line or chord sequence.
7. Fuzz
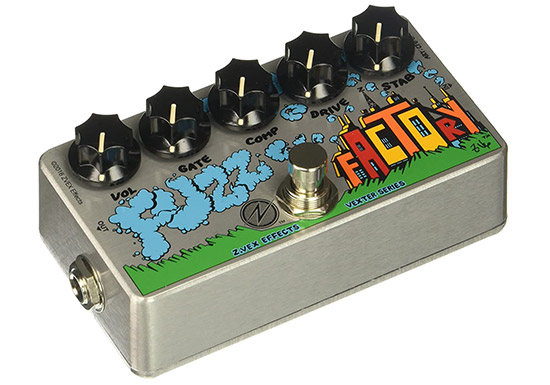
Fuzz is the most extreme gain based effect. It was discovered by accident in the early 1960s when a session guitarist in Nashville recorded a guitar through a faulty preamp. Fuzz pedals then became a staple of rock and blues tones in the years that followed.
Compared to overdrive, fuzz produces a much more prominent distorted tone. It causes the waveform to be boosted to the point where the audio clips and ample sustain is added. The effect is used mainly for single-note riffs, melodies, and solos.
Many fuzz pedals add more bass frequencies to a guitar’s output. This results in a thick, dense tone that sounds powerful and stands out in the mix. The Big Muff pedal and the Fuzz Face are two of the most popular offerings in this category of the pedal.
Third Category: Pitch/Frequency Guitar Pedals
Pitch/frequency effects cause modifications to the frequency of a guitar’s audio wave. This results in the pitch being modified from the original notes that are played. Some of these pedals also add new harmonies to the original signal.
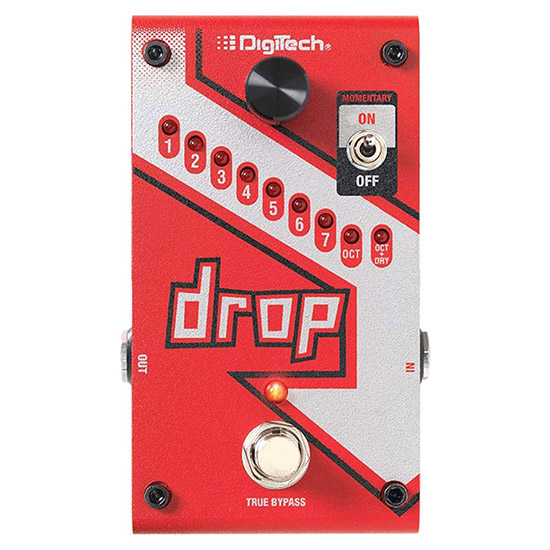
8. Octaver
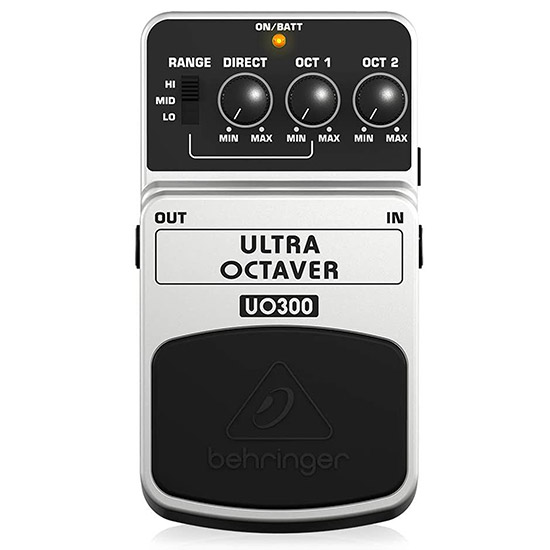
If you’re familiar with music theory, you’ll know that an octave is a term used to describe a twelve-note interval, where the same note repeats higher or lower on the guitar. Octave pedals simulate this, by creating a harmony that plays higher or lower octaves.
Most of these pedals allow you to add a sub-octave, one octave, or two octaves from the original note that you play. You can usually choose whether to keep the original note playing or take it out using the onboard parameters of the pedal.
This creates a thicker, full-bodied texture that adds density to the guitar’s clean tone. It’s usually only used for single-notes because when chords are played using an octave pedal things can get a little messy!
9. Pitch Shifter
The difference between an octave pedal and a pitch shifter is that the former is only capable of recreating the original note with a 12 step interval, whereas the latter can shift the pitch by any chosen interval. You can select one-note, three notes, five notes, and so on.
Pitch shifter pedals are great for creating experimental textures. The best pedals in this category give you freedom over the levels of the chosen interval that you add and allow you to subtract the original note from the output if you wish.
They allow you to create chords out of single-note melodies, and you can even recreate alternative tunings without physically needing to alter your guitar string tension. Pitch shifter pedals are also commonly used by vocalists to simulate the effect of adding harmonies and backing vocals without the need for other singers being present.
10. Tuner
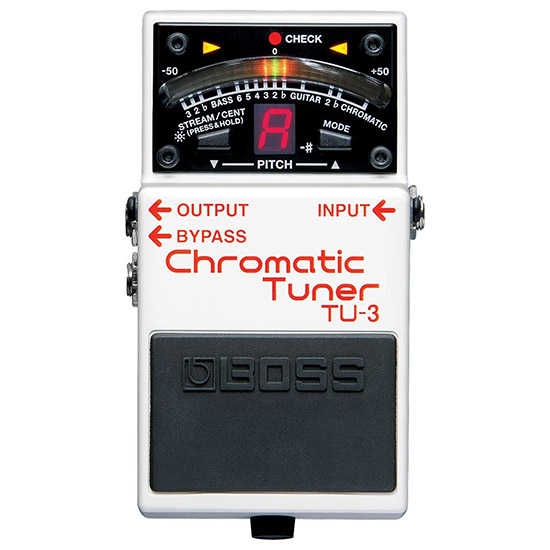
Although tuner pedals may not be the most exciting variety, they are vital components of any signal path nonetheless. They perform the integral role of displaying the current state of a guitar’s tuning, allowing you to quickly rectify any pitch issues and get on with your performance.
There are several varieties of tuner pedals available for the guitar. Some offer unique features like strobe tuners, pin tuners, and polyphonic tuning, which lets you see the strings that have strayed out of tune by strumming all of them at once.
Chromatic tuners are the most common type. They simply identify the pitch of the string and display its distance from the nearest note. The distance is measured in cents, and you can gradually increase or decrease the tension of each string to get it to bang in tune.
11. Harmonizer
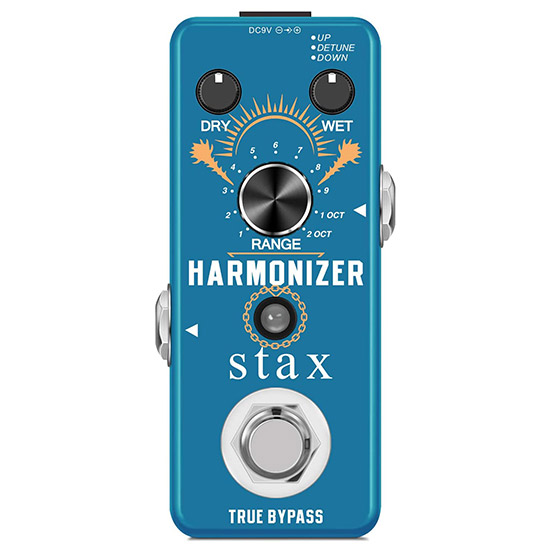
Harmonizer pedals are very similar to pitch shifters but are focused specifically on created ear-friendly variations to play alongside the original guitar note. Many of these devices are polyphonic, meaning they can be used for chords in addition to single-notes.
Fourth Category: Modulation Guitar Pedals
Modulation effects are amongst the most transformative of all guitar pedals. They work by altering the tonal properties of the guitar’s signal, causing variations to the prominence of a particular effect over time.
12. Phaser

A staple of psychedelic rock and funk guitar playing, phaser pedals use a device known as an LFO (Low-Frequency Oscillator) to change the frequency output of the instrument. The term phase describes a certain position on the frequency spectrum.
To create this effect, the pedal mixes a pair of identical signals. One of these signals is the original, dry tone produced by the guitar. The other signal features additional peaks and troughs, which boost or reduce the frequencies.
The LFO is used to gradually adjust the position of the filter on the second signal. This is then re-added to the original dry guitar tone, creating an immersive effect that evokes a feeling of motion. Onboard controls such as Speed, Rate, Depth, and Feedback are commonly housed within phaser guitar pedals.
These controls can be adjusted to change the prominence of the effect. This allows guitarists to add subtle phasing to their clean tone, or create a more extreme, swirling effect that sounds futuristic. Phaser pedals have been used by many iconic rock guitarists since their inception in the mid-1960s.
13. Flanger
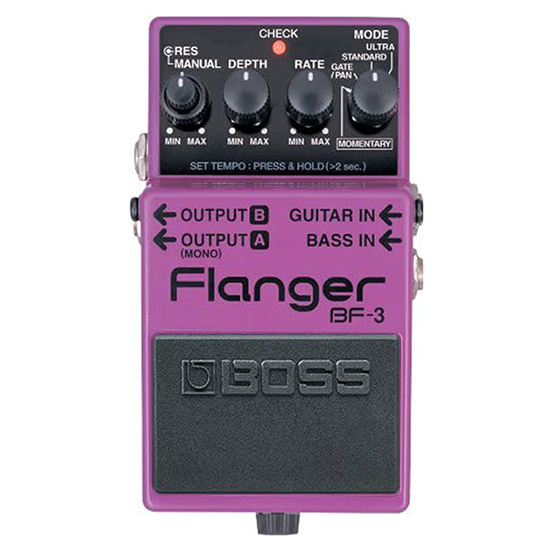
Flangers and phaser pedals are often categorized together because they essentially rely on the same basic process to produce the desired effect. The history of flanger pedals dates back to the 1940s when the legendary Les Paul discovered it accidentally.
The difference between phaser pedals and flanger pedals is subtle, but significant nonetheless. Flangers work by creating an identical copy of the guitar’s dry signal, then delaying the playback back varying periods.
Like with phaser pedals, flangers also use an LFO to vary the sound they produce. As the LFO moves, it causes the copied signal to be delayed by a certain amount of time. When used in extreme ways, flangers create a jet-engine effect.
Speed, depth, and level controls are commonly installed on flanger guitar pedals, allowing the musician to tweak the prominence of the effect. The amount of time that the second signal is delayed by ranges from 5-25ms, and when it is sent back into the signal chain, it creates harmonics feedback.
14. Chorus
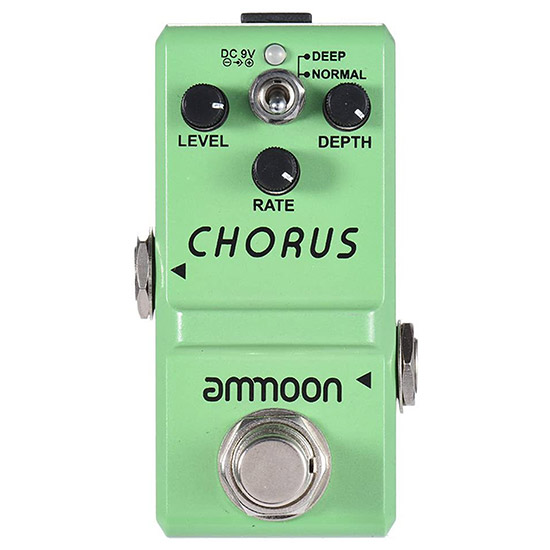
Chorus pedals have been used by countless guitarists over the years, adding color and modulation to some of the most recognizable riffs in recorded music history. They experienced a revival during the grunge era in the 1990s, and have remained popular ever since.
Like phasers and flangers, chorus pedals work by creating a duplicate of the guitar’s dry signal. Rather than create the swirling tones of the two aforementioned modulation effects, chorus pedals coat the guitar’s signal in a warm richness.
In the majority of cases, chorus pedals are used with the guitar’s clean tone. The sound they produce is very similar to double-tracking, and are compatible with both single-notes and chord sequences. By adjusting the onboard parameters, a guitarist can achieve a warble effect that resembles vibrato.
Unlike flangers that use an LFO to automate the time of the delayed signal, and phasers that adjust the relationship between the waveforms, chorus pedals use the device to control the pitch of the duplicate signal. The more variation there is in the pitch, the more of the recognizable warble is present.
15. Tremolo & Vibrato

Tremolo and vibrato guitar pedals are often grouped because they essentially produce the same form of modulation. This effect has been used on a plethora of records, dating back to the origins of rock n’ roll and being particularly prominent in the surf rock genre.
Technically speaking, tremolo causes a gradual increase and decrease in the volume of the original signal. Vibrato, on the other hand, causes fluctuations in pitch. Both effects cause rhythmic alterations to the guitar’s tone.
A cause of confusion amongst musicians is the tremolo arm that was famously installed on the Fender Stratocaster. This device should technically have been called a vibrato arm, but the name stuck, and therefore many guitarists confuse the two effects.
A Stratocaster’s “trem” arm causes the pitch of the guitar to be altered, by reducing the tension of the strings. Therefore, it is creating vibrato. Many tremolo pedals also house vibrato as a secondary effect, as the results sound very similar to one another.
Fifth Category: Volume/Dynamic Guitar Pedals
Having control over your dynamics is arguably the most important aspect of a pedalboard. Without the proper levels and volume, all of the other guitar pedals will be difficult to use as part of a signal chain. That’s why volume-based pedals are integral components.
Similar to when a mixing engineer first starts to process recorded audio, the initial stage of a pedalboard usually consists of effects pedals that control the dynamics. These pedals allow the more decorative effects to be used to their fullest potential and prevent unpredictability.
16. Compressor
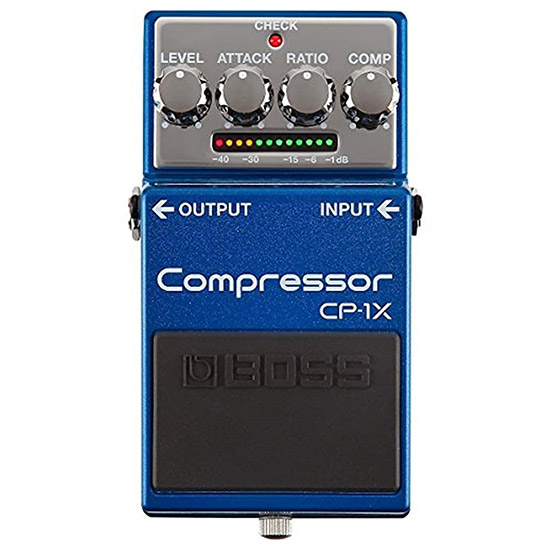
If you’ve got any experience recording and mixing music, you’ll be aware of the importance of compression. Many guitarists believe that compressor pedals are complex to understand and use, but they are very simple once you grasp their basic function.
Compressor pedals essentially reduce the dynamic range of the guitar. The dynamic range is the distance between the quietest volume and the loudest volume that the instrument can play. The compressor squashes this distance, making the dynamics more consistent.
The result is a guitar tone that sounds smoother. Compressor pedals can be used subtly, by setting the threshold and ratio parameters low. This will cause the quietest points to be raised slightly in volume, while the loudest points are reduced minimally.
Alternatively, compressors can be used to reduce the dynamic range significantly. This results in the volume of your playing being dramatically quieted or boosted, reducing the dynamic variation and making it sound less natural.
Compressor pedals are highly effective at preparing your signal for other pedals. With consistent dynamics, the guitar signal can interact with the pedals that come after the compressor in the chain more predictably.
17. Sustain
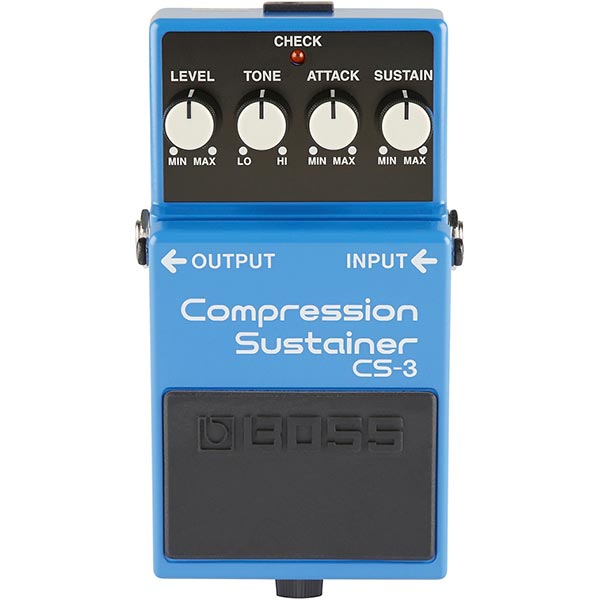
While circuitry may vary, Sustain is often simply a different name for the same effect as compression. By compressing your guitar signal, making weak signals stronger and strong signals weaker to level everything out, the signal will “sustain” longer. As the note naturally dyes out over time, the weakened tail end of the note will be boosted by the compression circuit.
18. Volume Pedal
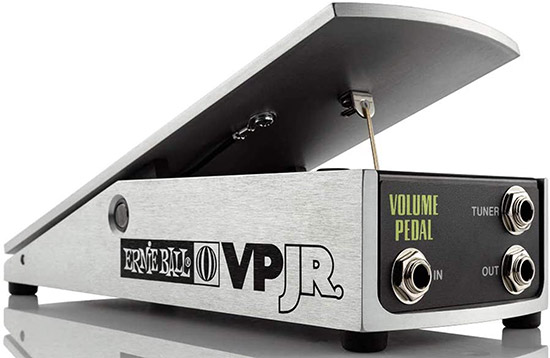
Volume pedals are versatile devices that can be used for several dynamic purposes. Firstly, you can use it as a master control, similar to the volume knob on your guitar. Alternatively, it can be used to create immersive soundscapes by adjusting the volume of the signal in real-time, in conjunction with reverb and delay pedals.
These pedals come in two varieties: active and passive. Passive volume pedals are simplistic, performing the function of controlling the dynamics of your guitar. Active volume pedals are more common and have an inbuilt buffer that prevents signal loss.
19. Envelope

Another popular dynamic guitar effect is the envelope filter. These pedals alter the tone of the instrument in response to the dynamics and velocity of your playing. The louder you play, the more dramatic the tonal variations become.
Unlike other effects pedals that are manipulated through changes of parameters and onboard controls, envelope filters are adjusted by the level of the signal that passes through them. This causes certain frequencies to be lowered in volume.
20. Noise gate
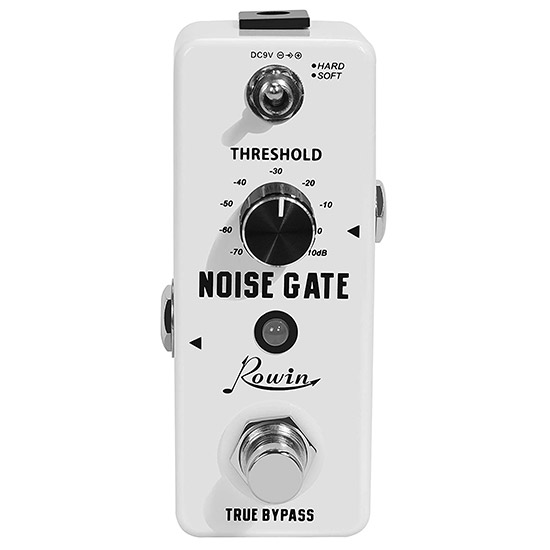
A popular tool for mixing recorded audio, noise gates are also available in pedal form. These devices control the volume of an audio signal in a similar way to a compressor. By adjusting the controls on the pedal, you choose which sounds can make their way into the signal path and which are removed.
Noise gate pedals are especially useful for signals that contain a lot of unwanted noise, causing clarity to be compromised. When the gate is open, the noise can pass through freely, but when it is closed, the unwanted noise is reduced or completely removed.
Sixth Category: Timing Based Guitar Pedals
Time-based pedals work by delaying the original signal of the guitar. They are extremely versatile effects and can be used subtly or for creating ambient soundscapes. These pedals are usually positioned at the end of the signal chain, due to the dramatic impact they have on the overall tone.
21. Reverb
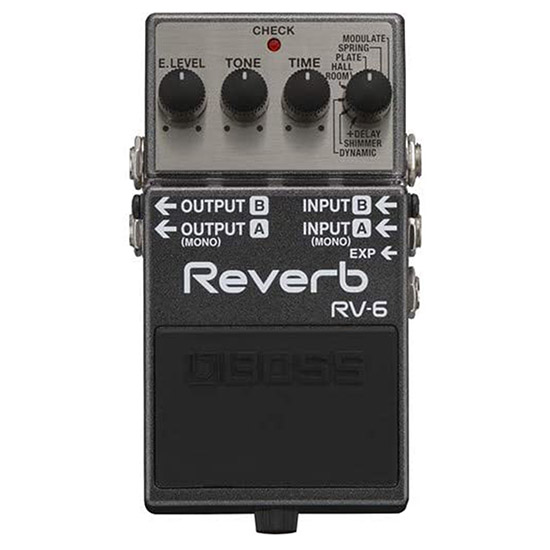
Reverb naturally occurs as a result of sound waves reflecting off certain surfaces. With the advancements in modern technology, pedal manufacturers have devised ways to replicate these natural reverb tones digitally.
If you’ve ever clapped in a large, empty room, you’ve probably heard the resonant tone that comes after the original sound. This is a reverb in its natural form. In music, it is used to add warmth to vocals and instruments.
Reverb pedals often contain several variations of this effect. Spring, hall, and plate reverb are amongst the most common. Spring reverb is featured on many vintages amplifies, and is produced by the sound coming into contact with metal springs.
Plate reverb is similar, except it uses large metal plated rather than springs. This results in a warmer, more reflective tone. Hall reverb is a simulation of natural, ambient space. By analyzing the dimensions and acoustic properties of buildings, pedal manufacturers can recreate the reverb tones and simulate them.
Most reverb pedals include the following selection of onboard controls: attack, decay, level, and tone. By adjusting these parameters, you can control the length of time that the reverb is present after the guitar note has been played, and choose which frequency bands it interacts with most prominently.
22. Delay
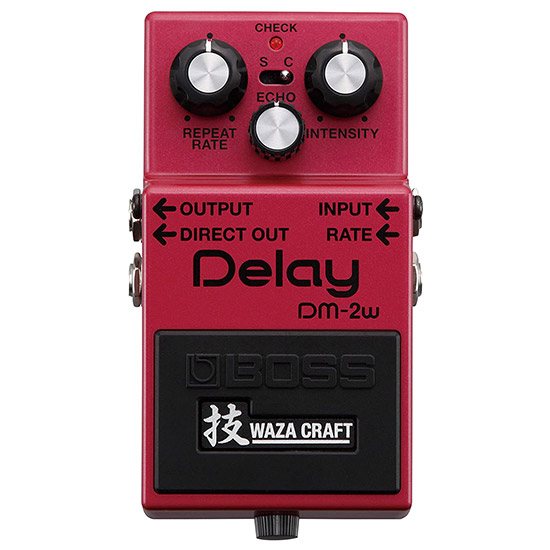
Delay pedals are highly useful and versatile tools. The basic principle of these pedals is that they cause the same note that you just played on the guitar to be played back within a certain timeframe. However, despite their simple function, delay pedals can be used in countless ways.
The three common controls featured on delay guitar pedals are time, feedback, and level. When the time control is adjusted, this affects the length of the gap between the initial note that you played and the first repeated delay.
The feedback control then adjusts the number of repeats that continue to play. With this control turned down, you will only hear one or two repeats before the sound dies out. With it cranked up, self-oscillation occurs and infinite delays are created.
The level control is also very important in deciding the overall delay effect. Turning it up causes the repeated notes to play at a higher volume, and therefore be more noticeable. Lowering this setting makes the effect more subtle.
Delay pedals are often paired with tap tempo footswitches. Many have these devices built-in. Tap tempo allows you to set the speed of the delay to be synchronized with the tempo of a backing track, or the rest of your band.
There are many variations of delay that are often housed within the pedal. These include tape echo, analog delay, digital delay, and dotted delay. Each offers distinctive tonal characteristics that are well suited to certain styles of guitar.
23. Looper
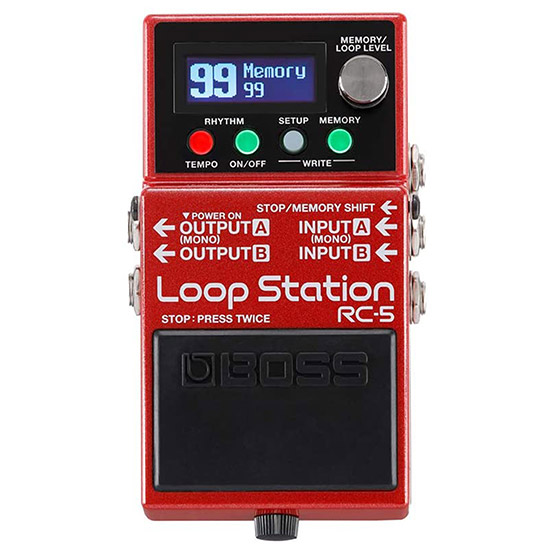
Looper pedals are great tools for solo guitarists who want to provide their accompaniment rather than play with a band. They range from primitive models that allow you to record a single backing track or more complex pedals that can create countless layers and separate recordings.
Most loopers work using footswitches. You tap the pedal to start the loop, play in a riff or chord sequence, then tap it again to end the loop. The audio then continues to play after you’ve stopped, and you can either add more loops over the top or play in real-time alongside the recorded loop.
Advanced loop pedals also include a range of other effects. Some offer percussive sections where you can program drum loops to accompany your guitar playing. It’s also common to find presets, reverbs, distortions, and modulation effects housed in loop pedals.
In addition to being highly useful tools for live performances, loopers are also helpful for composing new material. You can usually save your loops into the memory bank of the pedal, and go back to them at a later date to improve your creations.
Loopers aren’t just exclusive to guitarists, either. They commonly have microphone inputs so that you can create repeating vocal sections, stacking harmonies on top of one another.
Guitar Pedals – Essential Information
As a guitarist, your choice of instrument, amplifier, pickups, and strings will all undeniably have a large impact on your overall tone. However, the pedals that you choose to assemble in your signal chain are arguably just as important.
The most innovative and iconic guitarists in music history have all created their signature tones by using particular combinations of pedals. There are no rules to obey, and many of the best tones are discovered by accident.
In the remainder of this guide, you’ll find some tips and advice for getting the best out of the guitar pedals you opt to include in your rig. Then, you’ll be equipped with all of the necessary knowledge to choose which pedals you require for your personal needs.
How Should You Position Your Pedals in a Signal Chain?
When you begin to amass a collection of several guitar pedals, you’ll need to consider the order that you position them within your signal chain. This has a huge impact on the way each guitar pedal sounds, and the interactions between the various effects.
Although there’s a standard blueprint that you can follow, I’d encourage you to try out unconventional orders and try to come up with unique tones. Experimenting with signal chain posting is a great way to learn about the relationships between the different types of guitar pedals, and you may stumble across a combination that becomes the foundation of your sound.
The standard order of effects pedals is based on the following principles. Firstly, it is advised that you begin the signal chain with your tuner pedal, which is then followed by dynamic-altering effects. These include compressors, gates, limiters, and EQ pedals. Next, you should place any pedals that increase gain, such as distortion, overdrive, or fuzz.
Modulation based pedals are usually positioned after the gain-based effects. These include chorus, phasers, flangers, vibrato, or tremolo. Then comes octave pedals, pitch-shifters, and harmonizers. It is then advised that you follow your modulation pedals with timing-based effects, completing the chain with reverb and delay pedals.
The reason that this order is suggested is that it allows your signal to pass through each pedal without being overly altered as it enters the next. If, for example, you were to start the signal chain with delay pedals, all of the effects that follow it will be subjected to the timing alterations it causes, and things could end up getting messy.
Some pedals can slot in at various points within the signal chain, such as volume pedals and noise gates. These effects are relatively inobtrusive, and they can be used for various purposes. Looper pedals can also be positioned in any position, but bear in mind that you will only be able to include the effects that come before the loop pedal with any recordings you make with it.
Again, don’t feel that you have to stick to these suggestions. It’s a good idea, to begin with the conventional signal chain positioning, then make adjustments to see what tones the different orders produce.
Recording With Effects Pedals
The great thing about guitar pedals is that they are not just useful tools for live performances, but also in the recording studio. When it comes to recording using pedals, you essentially have two options. Each of these processes offers various benefits and drawbacks.
The conventional way to record guitar with pedals is by running them through your amplifier. This ensures that the tone you produce onstage is consistent with the tone of your recordings, provided you use the same amp settings. To record with an amplifier, you need to place a microphone in front of the speaker or take a line directly out and send it in to the audio interface.
There are a couple of downsides to this method, however. Firstly, the microphone that you choose will alter the overall sound of the recording. Dynamic and condenser microphones produce contrasting recordings, and cheaper mics are likely to color the guitar differently from more expensive ones.
The alternative method is to directly record from your guitar pedals into an audio interface. This bypasses the need for an amplifier and captures the raw tone of the guitar mixed with the pedals. The advantage this offers is that you can retrospectively send the audio through an amplifier if you wish, but using the previously mentioned method, you are stuck with the amplified audio that cannot be undone.
Recording through pedals directly into your chosen DAW means you have more freedom when mixing the sound. Nevertheless, there are some negatives to consider. Firstly, the quality of the preamps that are installed in the inputs of your audio interface will impact the overall tone of the guitar. Cheap preamps can be prone to noise issues that would be masked if you were using an amplifier.
It’s a good idea to experiment with both of these methods to find out which one comes closest to producing the results you desire. I’d recommend recording directly into the interface initially because you can always re-amp the guitar track later if you feel that it would be beneficial.
Inputs/Outputs
Another factor that you need to consider when assembling your pedalboard is how many inputs and outputs you need. Standard, small-sized stompbox guitar pedals offer singular inputs and outputs, whereas more advanced models are likely to have multiple of each.
The main advantage of having multiple outputs is that you can split your signal and start a new chain from the pedal in question. This is great for dual-amp setups, where you send the dry signal into one amplifier and your wet, effects signal into another.
Doing this allows you to keep your clean tone playing along with the effects that are part of the separate chain. For guitarists who need to keep their sound thick and full-bodied at all times, perhaps because they are in a three-piece band or don’t have a second guitarist, this ensures that no power is lost when the effects are activated.
This technique is also commonly used by bassists who want to retain the low-end frequencies when using effects. The clean, unaffected channel continues to play when the pedals are turned on, creating the illusion that two guitars or basses are playing at once.
Many guitarists in bands who play in large venues such as festival stages or arenas use this method. They split the signal in multiple places so that a new chain can be sent into a specific amplifier. This gives them more control over the way their guitar pedals interact with one another.
Powering Your Pedals
The majority of guitar pedals are powered by 9 volts DC. The most convenient way to provide power to your pedals is by using a dedicated power supply, which offers multiple voltage outputs. You can install these power supplies on your pedalboard to save time and effort when setting up your gear.
High-quality power supplies offer various voltages that accommodate the full range of guitar pedals. Some more advanced, complex pedals require a higher voltage than smaller stompboxes. A good power supply will offer 12 volts and 18 volts of power in addition to the standard 9 volts, making them suitable for all types of effects pedals.
It’s also common that smaller pedals can be powered by a battery. Indeed, the issue with relying solely on batteries to power your pedals is that you run the risk of them cutting out mid-performance or recording. Therefore, a power supply is a more reliable method.
With that being said, battery-powered pedals are useful if you’re playing in a setting where mains power is difficult to come by. For example, playing an outdoor show or a spontaneous performance might require you to use batteries over a dedicated power supply.
The most effective method would be to combine the use of batteries with mains power. This means that you are protected if either of the power sources cuts out unexpectedly. The other power supply simply takes over and prevents your guitar from being muted due to a lack of voltage.
Multi-Effects Pedals
Multi-effects pedals combine several types of guitar effects within a single unit. These pedals have powerful inbuilt processors, allowing you to switch between different processing options without needing to purchase multiple pedals.
Some combination pedals house effects which belong to the same category. For example, it’s common to find modulation-based units that produce phasers, chorus, flangers, vibrato, and tremolo. On the other hand, some pedals include a mixture of different effect types.
Indeed, opting for a multi-effects pedal can save you space on your pedalboard. There is a trade-off involved, though. In some cases, manufacturers focus less on the quality of individual effects when combining them within a singular unit. Standalone guitar pedals are solely built for one purpose, and so the quality of that effect is commonly superior to what is offered on a multi-effects pedal.
Advanced digital pedals offer the option of tweaking each effect, and saving them as presets. This is valuable if you want to create signature tones that aren’t based on preconceived, common settings. The processors within these pedals are often sophisticated and capable of running multiple effects simultaneously.
The other issue that comes with multi-effects pedals is that it’s harder to switch between the individual effects whilst playing. A conventional signal chain combats this issue, as you can activate the desired pedals using footswitches without needing to use your hands or toggle through several different options to get to the right one.
VST Plugins vs. Guitar Pedals
I’ve found that a great way to learn more about the way certain guitar pedals operate is by experimenting with VST plugins. These virtual effects can be loaded into your chosen DAW recording software, and many are already installed in the audio effects rack.
By loading up different types of effects and tweaking the various parameters, you can gain an understanding of what functions each control performs. Then, when it comes to using guitar pedals, you won’t be stuck wondering which knobs to turn to achieve your desired tones.
VST plugins work in the same way as guitar pedals, except rather than being physical devices they are digitally installed within your recording software. As music technology advances and home studios become the norm, more and more plugins are becoming available.
In many cases, plugin manufacturers will collaborate with pedal producers and create emulations of popular guitar pedals. Although the sounds may be slightly different, they produce very similar results. This means you can try out pedals virtually before committing to purchasing them if you are unsure of which ones to choose in a particular field.
True Bypass/Buffered Guitar Pedals
When guitar pedals were in their infancy, they were plagued with noise problems. As technology has progressed in recent decades, manufacturers and pedal designers have devised certain techniques to minimize these issues. The two most common methods are true bypass and buffered pedals.
True bypass and buffered guitar pedals share a common aim – to keep unwanted electronic noise at bay and protect signal integrity. However, the way they achieve this is contrasting. The most common nowadays is true bypass pedals, but buffered varieties are also popular.
What is a true bypass? These pedals are designed to let the signal from the guitar pass through the pedal, even when it is not turned on. This ensures that the tone of the instrument is preserved, with minimal alterations due to power fluctuations. Guitar pedals with true bypass circuitry don’t alter the dynamics of the signal. For cable runs that are under 18.5 ft, they are the best option, but anything over this can cause an issue with your signal integrity.
Buffered guitar pedals use a different technique to keep noise issues to a minimum. They protect the tonal clarity by boosting the guitar’s signal and driving it through the chain. This retains the dynamics and clarity of the original guitar signal. The buffering process is constantly happening, regardless of whether the pedal is turned on or off.
Deciding which of these two pedal types is the right choice depends on personal preference. If you’re using exceptionally long cable runs that exceed 18.5ft, I would recommend sticking with buffered pedals as they have the capabilities to handle this. Anything less than that, the true bypass will work just fine.
It would be wise to combine buffered and true bypass pedals if possible. This is arguably a more reliable option than using only of them. If you do opt to mix and match pedal types, make sure you begin your signal chain with a buffered pedal as this will boost the signal of your guitar initially so that it is strong enough to travel through the rest of your pedals.
Final Thoughts
Now that you’ve read this comprehensive guide to the different types of guitar pedals, you should have a good understanding of what each effect does, and which ones you would like to add to your signal chain. Physically experimenting with as many pedals as you can get your hands on is the best way to expand your knowledge.

My name is Chris and I’ve had a passion for music and guitars for as long as I can remember. I started this website with some of my friends who are musicians, music teachers, gear heads, and music enthusiasts so we could provide high-quality guitar and music-related content.
I’ve been playing guitar since I was 13 years old and am an avid collector. Amps, pedals, guitars, bass, drums, microphones, studio, and recording gear, I love it all.
I was born and raised in Western Pennsylvania. My background is in Electrical Engineering, earning a Bachelor’s degree from Youngstown State University. With my engineering experience, I’ve developed as a designer of guitar amplifiers and effects. A true passion of mine, I’ve designed, built, and repaired a wide range of guitar amps and electronics. Here at the Guitar Lobby, our aim is to share our passion for Music and gear with the rest of the music community.
Hello,
I am curious. After using a distortion pedal, does the pick-ups or amp stay charged with a distortion signal after the peal is removed? It seems my sound has some distortion to it for a little while after I remove the pedal.
It’s hard for me to know what might be going on with your rig without seeing and hearing it, but the short answer to your question is “No”. Effects pedals will not “charge” your guitar pickups or amp in any way. It only alters the characteristics of the signal that is passing through it. If your signal still has some true “distortion” to it, its likely coming from your amp.
Ahhh thank you very much. I have been looking for this type of guidance for a while! Thank you for such a thorough explanation! I will re organize and check it out.
I have Boss: tuner, Blues driver, Compressor/sustain, digital delay, looper, an Ebenezer boost, and a Dunlop Volume/Wah Set up on a pedaltrain.
Presently, am eyeballing JHS “the Clover” to replace Ebenezer which is a very nice boost on Fender single coils but, sometimes gets my Twin Reverb all excited and tubes crackling with the Gibson PAF’s!